Prestigious Custom Cabinets

Custom Cabinets

what is a waterfall countertop​
Countertops, Custom Cabinets

What Is a Waterfall Countertop? A Complete Guide

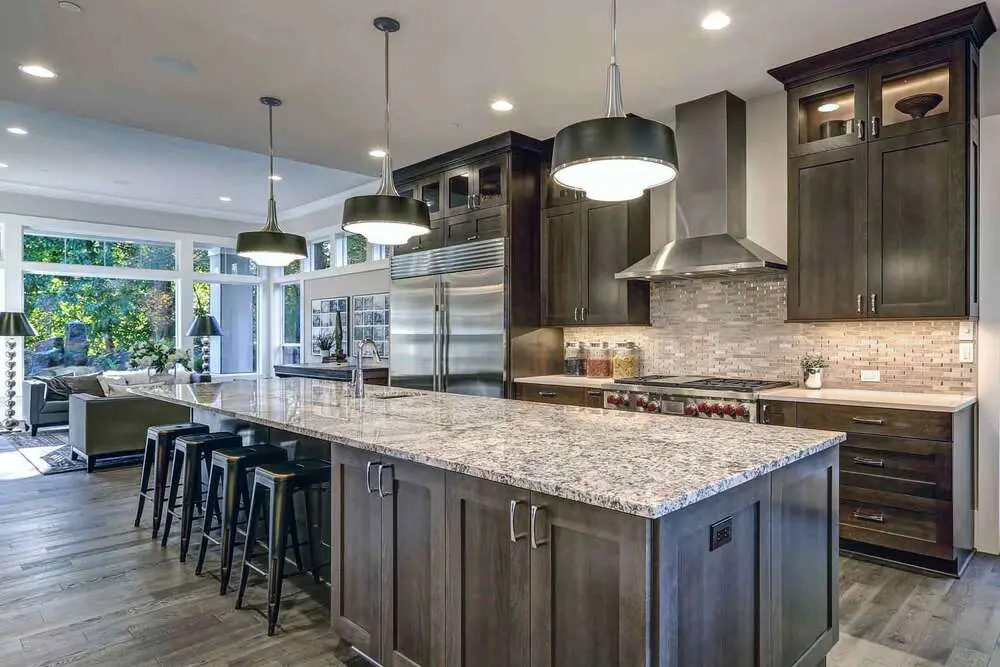
Kitchens have changed a lot. Clean lines, bold materials, and smart design are what homeowners want now. One feature that keeps showing up in modern homes is the waterfall countertop. It looks sharp, feels expensive, and adds real visual weight to any kitchen. So, what is a waterfall countertop exactly? It’s a countertop where the surface material runs straight down the sides of the island or cabinet, all the way to the floor. It creates a smooth, unbroken edge like water falling down. Below, you’ll learn everything about this design choice before you commit to it. What Is a Waterfall Countertop? A waterfall countertop is a style where the countertop material extends vertically down one or both sides of an island or cabinet base. Instead of stopping at the edge, the slab keeps going floor to top in one continuous piece. The term “waterfall” comes from how it looks. The material seems to flow downward, like a sheet of water falling over a ledge. This style is popular in modern and contemporary kitchens. But it also works in transitional spaces where clean design meets warmth. How It Differs from a Standard Countertop A regular countertop sits flat on top of cabinets. The sides are either exposed raw wood or covered with a simple panel in a different material. A waterfall counter wraps around the side, using the same material top-to-bottom. That matching edge is the whole point. It creates visual unity. Everything looks like it was carved from one piece. A Quick History The waterfall edge became popular in the early 2010s as open-plan kitchens took over. Homeowners wanted islands that looked like furniture sculptural, clean, and intentional. High-end designers started using it with marble and quartz. By the mid-2020s, it became a mainstream request in kitchen remodels across the country. Design Advantages of Waterfall Countertops with Design Surfaces There are real reasons designers love this look. Here’s what waterfall countertops bring to the table literally. 1. Strong Visual Impact A waterfall counter commands attention. When you walk into a kitchen, the island becomes a focal point. The vertical slab adds height and depth to what would otherwise be a flat, horizontal surface. If your material has bold veining like marble or certain quartzite the pattern flows from top to side. That continuity is stunning. Interior designers call it “book matching,” where two slabs are mirrored to create a symmetrical pattern across the seam. 2. Protects Cabinet Sides The vertical panel isn’t just pretty. It covers and protects the cabinet sides from bumps, scuffs, and moisture. This matters on kitchen islands that take daily wear backpacks dropped against them, chairs scraping, cleaning products splashing. A stone or quartz panel is far more durable than painted wood. 3. Hides Cabinet Construction Not every cabinet build is perfect. A waterfall countertop hides the end panel of your cabinets completely. If you’ve got a seam, a small gap, or a less-than-perfect finish on the cabinet side, the slab covers it cleanly. 4. Works with Many Layouts Waterfall countertops work on: Kitchen islands (most common) Peninsulas Breakfast bars Bar counters in dining rooms Bathroom vanities You’re not locked into one room or one use case. 5. Adds Resale Value Buyers notice quality finishes. A well-done waterfall counter signals a thoughtful kitchen renovation. Real estate agents in major markets consistently list it as a kitchen feature that attracts buyers and supports higher asking prices. You can read about: How Much Does It Cost to Install Countertops Potential Drawbacks and Practical Considerations No design choice is perfect. Before you commit to waterfall countertops, know what you’re getting into. 1. Higher Material Cost You need more material. A standard countertop covers only the top surface. A waterfall counter needs extra slab for the vertical panel. Depending on your material, that can add significant cost. With natural stone like marble, you also want the veining to match. That means choosing your slabs carefully at the yard and sometimes paying more to get two pieces from the same block. 2. More Complex Installation Installing a waterfall counter isn’t a basic job. The mitered corner where the top meets the side panel needs precision cutting. A bad cut shows a gap or an off-angle seam. You need an experienced fabricator who has done this before. At Prestigious Custom Cabinets, we work with skilled fabricators who handle these cuts with care. The seam should be nearly invisible when done right. 3. Seating Challenges If you want bar stools at your island, a waterfall end can get in the way. The vertical slab blocks the corner seat. You either lose that corner position or you need to plan your layout around it from the start. This is a common issue homeowners don’t think about until the cabinets are already set. Plan your seating layout before you finalize the waterfall design. 4. Not Every Style Fits Waterfall countertops look best in modern, contemporary, or transitional kitchens. If your home has a farmhouse, cottage, or traditional style, the look can feel out of place. It’s a bold design statement to make sure your overall aesthetic supports it. 5. Cleaning Around the Base The bottom edge of the vertical panel sits right at the floor. Mopping around it and keeping the base clean takes a little more attention. You’ll want a tight seal between the stone and the floor to prevent moisture from getting underneath. Choosing Materials and Finishes for Your Waterfall Kitchen Island The material you pick shapes everything: the look, the durability, and the price. Here are the most common options for what waterfall countertops are made of. Quartz Quartz is the most popular choice for waterfall countertops right now. It’s engineered, so it’s consistent in color and pattern. It doesn’t need sealing. It handles heat and scratches reasonably well. For a waterfall edge, quartz is forgiving because the pattern is uniform. Matching the top and the side panel is easy, no dramatic veining to align. Best for: Busy kitchens, families, people
do you need a permit to remodel a kitchen
Custom Cabinets, kitchen remodel

Do You Need a Permit to Remodel a Kitchen? Find Out

Planning a kitchen remodel is exciting. New cabinets, fresh countertops, updated appliances all sound great. But before you swing that first hammer, you need to know one thing: permits. Most homeowners skip this step and later pay a serious price. So, do you need a permit to remodel a kitchen? The short answer is yes in most cases. If your project involves electrical, plumbing, or structural work, a permit is required. Simple cosmetic updates like painting or swapping out cabinet doors usually don’t need one. Keep reading to know exactly when you need a permit and how to get one. Do You Need a Permit for a Kitchen Remodel? Yes, a kitchen remodel permit is required for most major projects. The rule of thumb is simple: if you’re changing how things work, not just how they look you likely need a permit. Local building departments issue permits to make sure your remodel meets safety codes. These codes protect you, your family, and anyone who buys your home later. Think of a permit as an official safety check. Here’s a quick breakdown of what typically requires a permit vs. what doesn’t: Electrical work (new outlets, panel upgrades, rewiring) — PERMIT REQUIRED Plumbing changes (moving pipes, adding a sink) — PERMIT REQUIRED Structural work (removing a wall) — PERMIT REQUIRED New appliances needing new gas or electric lines — PERMIT REQUIRED Painting, new cabinet doors, or new hardware — NO PERMIT NEEDED Replacing countertops (same location) — NO PERMIT NEEDED Why Do You Need To Get a Permit for Your Remodeling Project? Many homeowners try to skip permits to save time and money. That’s a big mistake. Here’s why getting a kitchen remodel permit matters: Safety: Inspectors catch dangerous wiring, gas leaks, or weak structural changes before they cause harm. Home value: Unpermitted work can drop your home’s resale value. Buyers and their agents always check permit history. Insurance: If unpermitted work causes a fire or flood, your homeowner’s insurance may deny the claim. Legal protection: Selling a home with unpermitted work can lead to lawsuits or forced removal of the work. Code compliance: Permits ensure your home meets local building codes, which change over time. When Do You Need a Permit To Remodel a Kitchen? Does a kitchen remodel require a permit? It depends on the scope of work. Local rules vary by city and state, but these general triggers apply almost everywhere in the U.S.: You need a permit when you: Move or add electrical outlets or circuits Upgrade your electrical panel to handle new appliances Move or install new plumbing lines for a sink or dishwasher Add or modify gas lines for a range or oven Remove or alter load-bearing walls Install a new ventilation or exhaust hood requiring ductwork Add or change HVAC systems You likely don’t need a permit when you: Replace existing cabinets in the same layout Swap countertops without moving plumbing Replace a like-for-like appliance (same gas or electric hookup) Paint walls or ceilings Install new flooring (no structural changes) Still unsure? Call your local building department or check their website. A quick 5-minute call can save you thousands in fines later. How Do You Get a Permit for a Kitchen Remodel? Getting a kitchen renovation permit is not as hard as most people think. The process is straightforward if you know what to expect. Types of Permits Required for Kitchen Remodeling There isn’t just one permit. Depending on the work, you may need several. Here are the most common ones: Building Permit: Covers general construction, structural changes, and major renovations. Electrical Permit: Required for new wiring, circuits, outlets, and panel work. Plumbing Permit: Needed when you move, add, or change plumbing lines. Mechanical Permit: Covers HVAC systems, ventilation ductwork, and exhaust fans. Gas Permit: Required when modifying or adding gas lines for stoves or ovens. Your contractor usually knows which permits are needed. A good contractor will always pull the right kitchen renovation permits before starting work. If they refuse to pull permits, that’s a red flag to walk away. Step-by-Step Process to Get a Kitchen Remodel Permit Plan your project: Write down every change you plan to make. Be specific. Contact your local building department: Call or visit their website. Ask which permits your project needs. Gather your documents: Most departments need floor plans, project drawings, and specs (see below). Submit your application: Apply online or in person. Pay the permit fee. Wait for approval: Most permits take a few days to a few weeks. Start construction: Post the permit visibly at the job site. Schedule inspections: Inspectors visit at key stages (rough-in, final). Get final approval: Once all inspections pass, your permit is closed out. You can read about: How Long Does a Kitchen Remodel Take Documents Required for Kitchen Remodel Permit Before applying, gather these documents. Not every jurisdiction needs all of them, but it’s better to be prepared: Completed permit application form Site plan (showing where your home sits on the lot) Floor plan of your kitchen (existing and proposed layout) Electrical diagrams (if doing electrical work) Plumbing schematics (if moving or adding plumbing) Contractor’s license and insurance info Material and product specifications for major items If you hire a licensed contractor, they will usually handle the permit application for you. Just make sure you confirm this upfront. How Long Does It Take to Get a Permit? Permit timelines vary by location. Here’s what you can generally expect: Small towns and rural areas: 1 to 5 business days Suburbs and mid-size cities: 1 to 3 weeks Large cities: 3 to 8 weeks (sometimes longer) Some cities now offer online permit applications that speed up the process. Over-the-counter permits for simpler jobs can sometimes be issued the same day. Pro tip: Apply for your permit before you finalize your contractor start date. This way, you don’t have to pay workers to sit around waiting. Cost of Kitchen Remodel Permits Permit costs depend on your location and the scope of work.

how much does it cost to install a bathroom vanity
Bathroom Vanity, Custom Cabinets

How Much Does It Cost to Install a Bathroom Vanity | Guide

Replacing a bathroom vanity is one of the smartest upgrades you can make. It changes how the room looks, adds storage, and fixes the daily frustrations of a worn-out fixture all without gutting the entire bathroom. Most homeowners are surprised by how wide the price range is until they understand what drives it. So, how much does it cost to install a bathroom vanity? In 2026, most homeowners pay between $300 and $3,800 total vanity unit plus labor. The national average sits around $1,500. What you actually spend depends on vanity size, type, plumbing complexity, and your location. This guide breaks every variable down so you can budget accurately before spending a dollar. Bathroom Vanity Installation Costs in 2026 Here’s the big picture on bathroom vanity installation cost in today’s market: Project Type Total Cost Range Basic vanity swap (same location) $300 – $900 Standard single vanity install $800 – $1,800 Standard double vanity install $1,200 – $3,000 Floating/wall-mounted vanity $1,000 – $2,500 Custom vanity installation $2,500 – $6,000+ Full vanity + plumbing relocation $2,000 – $5,000+ Labor only: $150 – $700 for a standard install. Plumbers charge $45 – $120 per hour for any water line or drain work. Vanity unit cost only: Budget/stock: $100 – $500 Mid-range: $500 – $1,500 Premium/custom: $1,500 – $5,000+ The cost to install bathroom vanity always has two parts: the unit itself and the labor. Never budget for just one. Bathroom Vanity Cost Breakdown by Category Understanding where each dollar goes helps you make smarter choices. Here’s a typical full-install breakdown for a mid-range single vanity: Cost Item Typical Range Vanity cabinet unit $400 – $1,200 Countertop (if separate) $150 – $600 Sink (if not included) $80 – $400 Faucet $80 – $350 Installation labor $150 – $500 Plumbing connection/adjustment $100 – $400 Old vanity removal and disposal $75 – $200 Mirror or medicine cabinet $80 – $500 Lighting fixture $50 – $300 Estimated total $1,165 – $4,450 Most mid-range projects land around $1,200 to $2,000 when all line items are accounted for. The gap between a $900 project and a $3,500 project almost always comes down to vanity quality, plumbing work, and whether you’re changing the sink location. Bathroom Vanity Costs by Type Different vanity types carry different price tags even before labor. Freestanding Vanity The most common type. Sits on four legs or a solid base. Easiest to install because it doesn’t require wall anchoring beyond standard connections. Unit cost: $200 – $2,000 Install labor: $150 – $400 Total installed: $350 – $2,400 Floating (Wall-Mounted) Vanity Mounted directly to wall studs or a blocking board. Requires locating studs and sometimes adding blocking inside the wall. More complex to install than a freestanding unit. Unit cost: $300 – $2,500 Install labor: $250 – $600 Total installed: $550 – $3,100 Vessel Sink Vanity Designed for above-counter bowl sinks. The cabinet is lower than standard (31–33 inches) to accommodate the vessel height. Faucet height also needs to match. Unit cost: $250 – $1,800 Install labor: $200 – $500 Total installed: $450 – $2,300 Double Sink Vanity Two sinks, wider cabinet (typically 60–72 inches), two sets of supply and drain connections. More material, more labor. Unit cost: $600 – $4,000 Install labor: $300 – $700 Total installed: $900 – $4,700 Custom Built-In Vanity Built to exact dimensions, often by a cabinet maker. The most expensive option but fits unusual spaces perfectly. Unit cost: $1,500 – $8,000+ Install labor: $400 – $1,200 Total installed: $1,900 – $9,200+ Vanity Installation Cost by Size and Bathroom Type Vanity size is one of the clearest cost predictors. Here’s how size maps to total installed price: Vanity Width Bathroom Type Typical Installed Cost 18″ – 24″ Powder room / half bath $400 – $1,200 30″ – 36″ Standard full bath $700 – $1,800 42″ – 48″ Master bath or larger $1,000 – $2,500 60″ (double) Master bath, shared bath $1,400 – $3,500 72″+ (double) Master suite $2,000 – $5,000+ Powder room (half bath): Typically the simplest install. No tub or shower, usually just a toilet and small vanity. Labor is straightforward. Full bathroom: More obstacles to work around tub, shower, toilet all compete for space. Measuring and maneuvering are more involved. Master bathroom: Larger vanities, often double sinks, sometimes custom dimensions. More labor time and higher material cost. Main Factors That Affect Vanity Installation Costs These are the variables that move your final number most significantly: Plumbing Location Changes Keeping the sink in the exact same location is the single biggest cost-saver. Moving a drain line costs $200 – $800 extra. Moving supply lines adds another $150 – $400. If possible, choose a vanity that matches your existing plumbing footprint. Vanity Size and Weight Larger, heavier vanities take more labor to move and position. A 72-inch double vanity often requires two installers. That extra labor adds $100 – $300 to the bill. Floating vs. Freestanding Wall-mounted vanities require locating studs or adding a blocking board inside the wall. This adds 1 to 2 hours of labor and sometimes drywall patching $150 – $350 more than a standard freestanding install. Old Vanity Removal Most installers charge $75 – $200 to demo and haul away your existing vanity. If it’s a large vanity with a cultured marble countertop, a demo can take 30 to 60 minutes and add weight to the disposal load. Countertop Type Pre-assembled vanities with integrated tops cost less to install than separate countertops requiring measurement, cutting, and seaming. Separate stone countertops (granite, quartz) add $150 – $500 to the project. Electrical Work New vanity lighting or GFCI outlet upgrades need a licensed electrician. Each new outlet or fixture runs $100 – $300 in labor. Verify whether your existing wiring meets current code before installation begins. Regional Labor Rates The bathroom vanity install cost varies significantly by geography. In high cost-of-living areas like Long Island, New York City, or San Francisco, labor runs 20% – 35% above the national average. The same install that costs $400 in labor

How to Clean Quartz Countertops
Custom Cabinets, Quartz Countertops

How to Clean Quartz Countertops: Full Guide

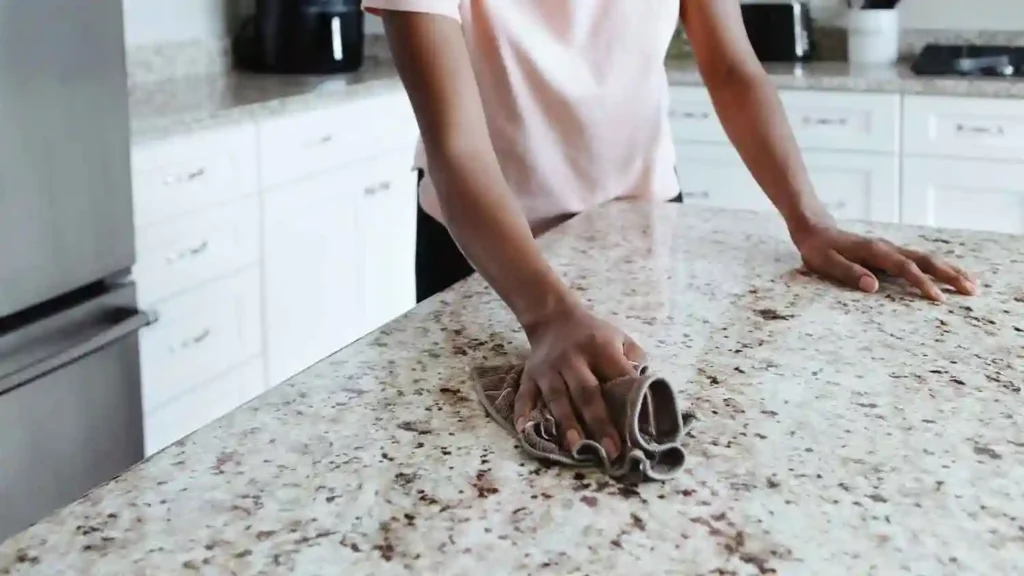
Quartz countertops look great and hold up well in busy kitchens. But even this tough material needs proper cleaning to stay looking new. The good news is that quartz is one of the easiest countertop materials to maintain. A damp cloth and mild dish soap handle most messes in under two minutes. No special products required for daily use. Knowing how to clean quartz countertops the right way also means knowing what to avoid. The wrong cleaner can dull the surface permanently. This guide covers daily routines, tough stain removal, product recommendations, and every mistake that shortens quartz life. Why Quartz Countertops Need Proper Care Quartz is engineered stone. It is made from about 90% ground quartz crystals bonded with polymer resin. That resin makes quartz non-porous and highly stain resistant. But the same resin that makes quartz so durable is also its vulnerability. Harsh chemicals break down the resin binder. Once the resin is damaged, the surface loses its polish, becomes dull, and may develop discoloration that cannot be reversed. No amount of cleaning fixes chemically damaged quartz. Prevention is the only solution. Abrasive cleaners and scrubbing pads physically scratch the resin surface. Even small scratches dull the finish and make the countertop harder to clean over time because debris catches in the micro-scratches. Understanding this helps explain every recommendation in this guide. Every cleaning method and every product warning comes back to protecting the resin that keeps quartz performing the way it should. Daily Cleaning Routine for Quartz Countertops The daily routine for cleaning quartz countertops is simple. It takes about two minutes. Done consistently, it prevents buildup that requires more aggressive cleaning later. What you need: Warm water Mild dish soap (Dawn or similar) Soft microfiber cloth or non-scratch sponge The daily routine: Dampen your microfiber cloth with warm water. Add one or two drops of mild dish soap. Wipe the countertop surface using gentle circular motions. Pay extra attention to areas near the stove, sink, and food prep zones where grease and food particles accumulate. Rinse the cloth with clean water. Wipe the surface again to remove any soap residue. Soap left on the surface dries and leaves a film that makes the countertop look dull. Dry the surface with a clean dry cloth. This prevents water spots, especially in hard water areas where mineral deposits build up quickly. That is the complete daily routine. No sprays, no special products, no waiting. Just soap, water, and a cloth. For most kitchens, this is all you ever need for day-to-day cleaning of quartz countertops. How to Remove Tough Stains from Quartz Countertops Some spills need more than a quick wipe. Here is how to handle the most common tough stains without damaging the surface. Dried or Caked-On Food Do not scrub dried food with force. That scratches the surface. Instead: let warm water soak the dried food for 5 to 10 minutes. The water softens it. Then use a plastic scraper or the edge of a credit card to gently lift the food off the surface. Follow up with the standard soap and water wipe. Never use a metal scraper, steel wool, or abrasive pad on quartz. Metal and abrasive materials scratch the resin surface permanently. Grease and Oil Splatter Apply a small amount of dish soap directly to the greasy area. Let it sit for 2 minutes. Dish soap is specifically designed to cut through oil and grease. Wipe with a warm damp cloth in circular motions. Rinse thoroughly and dry. For heavier grease buildup from cooking splatter, a spray degreaser safe for quartz works well. Look for products labeled safe for engineered stone. Coffee and Tea Stains Coffee and tea can leave a light stain if left to sit. Wipe up coffee spills immediately when possible. For dried coffee stains: apply a mixture of equal parts water and isopropyl alcohol (rubbing alcohol) to the stain. Let it sit for 2 to 3 minutes. Wipe with a soft cloth. Rinse with clean water and dry. Rubbing alcohol is safe for quartz in moderate use. It evaporates quickly and does not leave residue. Do not use it every day as a regular cleaner, but it is effective for occasional stain treatment. Wine and Juice Stains Highly pigmented liquids like red wine, pomegranate juice, and grape juice can leave faint surface stains if not wiped up quickly. For fresh spills: wipe immediately with a damp cloth and soap. Act fast and most stains come right up. For dried stains: apply a small amount of non-bleach household cleaner or a dedicated quartz cleaning spray. Let sit for 3 minutes. Wipe with a soft cloth. Rinse and dry. If a faint mark remains, repeat once or twice. Permanent Marker and Ink Permanent marker on quartz is alarming but usually fixable. Apply rubbing alcohol to a soft cloth. Do not pour it directly on the counter. Press the cloth on the marker mark and hold for 30 seconds. The alcohol dissolves the ink. Wipe away. Repeat if needed. Rinse with water and dry. Nail polish remover also works for marker and ink but should be rinsed off extremely quickly. Nail polish remover contains acetone which can damage the resin if it sits on the surface for more than a few seconds. Hard Water Spots and Mineral Deposits In areas with hard water, white mineral deposits build up around the sink and faucet area over time. Use a mixture of equal parts water and white vinegar to clean hard water spots. Apply with a cloth, let sit for 2 minutes, and wipe away. Rinse thoroughly with water afterward. Vinegar is mildly acidic. Use it only for targeted hard water removal, not for regular daily cleaning. Repeated daily use of vinegar can dull the quartz surface over time. Rust Stains Rust stains happen when iron-containing items like cast iron pans or steel wool sit on the wet quartz surface. Apply a non-abrasive rust remover safe for stone surfaces. Bar Keepers Friend in

how to build a closet​
Custom Cabinets, Closets

How to Build a Closet: Complete DIY Guide

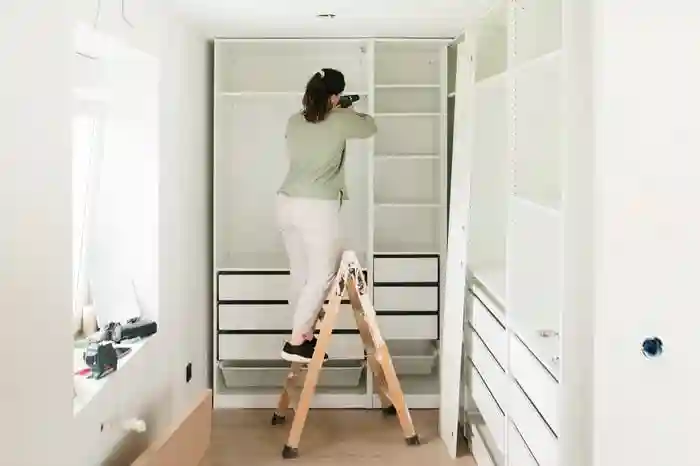
Most homes don’t have enough storage. A well-built closet fixes that fast. Whether you’re dealing with a spare bedroom, a blank wall, or just wasted space, adding a closet can completely change how your home feels and functions. If you want to know how to build a closet the right way, this guide covers everything: planning, tools, materials, costs, and step-by-step instructions. You’ll get real answers, not guesswork. Understanding Closet Types Before you pick up a single tool, know what type of closet you’re building. Each one serves a different purpose. Reach-in closets are the most common. They sit flush against a wall with sliding or hinged doors. Great for bedrooms and hallways. Walk-in closets need more floor space, usually at least 4×4 feet. They offer better organization and feel more like a room. Wardrobe closets are freestanding units. No framing required. Good for rentals or rooms without built-in storage. Linen closets are narrow and deep. Shelving is their main feature. Knowing your type upfront saves time and money later. Planning Your Closet Space Good planning is half the work. Here’s what to do before building anything. Measure twice, cut once. Get the exact height, width, and depth of your space. Most standard closets are 24 inches deep for hanging clothes and 12 inches for shelves. Check for obstacles. Look for outlets, vents, or pipes inside the wall. Use a stud finder before you do anything else. Draw a simple layout. You don’t need fancy software. A pencil sketch works. Mark where the hanging rod, shelves, and drawers will go. Think about your storage needs. Do you have more folded items or hanging clothes? That decides your shelf-to-rod ratio. Pick your door style. Bifold doors save space. Sliding doors work well in tight rooms. Hinged doors need clearance but feel more traditional. Tools and Materials You’ll Need Here’s a practical list for building a closet in a room: Tools: Stud finder Level (2-foot and 4-foot) Tape measure Circular saw or miter saw Drill and drill bits Hammer Nail gun (optional but speeds things up) Pencil and square Materials: 2×4 lumber (for framing) Drywall and joint compound Wood screws and nails Closet rods and brackets MDF or plywood for shelving Sandpaper and primer Paint Closet door of your choice Door hardware (hinges, handles, track if sliding) You can buy most of this at any home improvement store. Budget items work fine for basic builds. Go with solid wood or melamine-coated MDF for shelving if you want it to last. Step-by-Step: How to Build a Closet Here’s how to construct a closet from scratch. This applies to a basic reach-in or walk-in build. Step 1: Mark the Wall Layout Use a pencil and level to mark the closet’s footprint on the floor and wall. Snap chalk lines if you want clean guides. Step 2: Frame the Walls Cut your 2×4 lumber to size. Build a simple frame: a bottom plate, top plate, and vertical studs every 16 inches. Secure the bottom plate to the floor with construction screws. Anchor the top plate to ceiling joists. Add a doorway frame. Leave a rough opening about 2 inches wider and taller than your door. Step 3: Install Drywall Cut drywall panels to fit. Screw them into the studs. Tape the seams and apply joint compound. Let it dry fully, then sand smooth. Step 4: Prime and Paint Apply one coat of primer. Once dry, paint the interior walls. White or light gray keeps the space bright and clean. Step 5: Install Shelving Cut your shelves to length. Use a level to mark shelf heights on the wall. Locate studs and screw in shelf brackets. For a standard closet, put the top shelf at about 84 inches and lower shelves at 12-inch intervals. Step 6: Install the Closet Rod Mount rod brackets 12 inches from the back wall. Standard rod height for hanging full-length clothing is 66 to 70 inches. For double-hanging, place rods at 40 and 80 inches. Step 7: Hang the Door Follow the door manufacturer’s instructions. For bifold doors, install the track first. For hinged doors, set the hinges before you hang. Check that it opens and closes without sticking. Step 8: Add Trim and Finishing Touches Install door casing and baseboard molding. Caulk any gaps. Touch up paint. Add hooks, drawer pulls, or a light if needed. That’s how to build a bedroom closet from the ground up. You can read about: How to Build Closet Shelves Closet Organization Tips A well-built closet still needs smart organization. Group clothing by type: shirts, pants, dresses, shoes. Use shelf dividers to separate folded stacks. Add a second hanging rod if you store mostly short items. Use clear bins on upper shelves for out-of-season items. Install a simple LED strip light. It makes finding things much easier. Leave a few inches of breathing room on each shelf. Overstuffing damages clothes and shelves. Common Mistakes to Avoid These are the errors that slow projects down or cost extra money. Skipping the stud finder. If you screw into drywall alone, shelves will fall under weight. Not checking for level. Even a small tilt makes shelves look off and causes items to slide. Wrong shelf depth. Shelves that are too deep waste space and make things hard to reach. Ignoring ventilation. Closets need a little airflow to prevent musty odors. Keep the door cracked occasionally or add a small vent. Buying cheap rods. Thin rods bow under heavy clothes. Go with a steel rod or use a center support bracket. Rushing the drywall. The wet compound needs 24 hours to dry between coats. Rushing leads to cracks later. Cost to Build a Closet Here’s a rough breakdown for a basic reach-in closet: Item Estimated Cost Lumber (framing) $50–$150 Drywall $40–$100 Shelving materials $60–$200 Closet rod + brackets $20–$60 Door $80–$300 Paint + primer $30–$70 Hardware $20–$50 Total (DIY) $300–$930 Hiring a contractor adds labor costs, typically $500 to $1,500 depending on size and complexity. Custom closets

what is the best paint for kitchen cabinets​
Custom Cabinets, Kitchen Cabinet Painting

What Is the Best Paint for Kitchen Cabinets? Top Picks That Actually Last

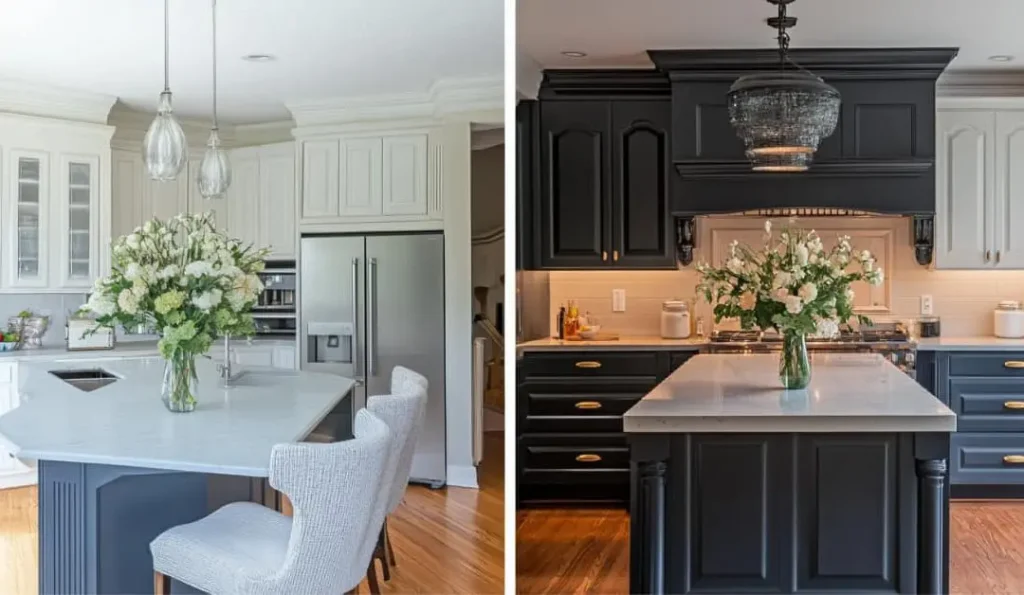
Painting your kitchen cabinets is one of the smartest upgrades you can make. It costs a fraction of a full remodel and can completely transform how your kitchen looks and feels. But the paint you choose makes or breaks the whole project. So, what is the best paint for kitchen cabinets? Short answer: a water-based urethane or alkyd enamel. It dries hard, cleans up easily, and holds up against grease, moisture, and daily use. This guide covers everything you need to pick the right one. Why Choosing the Right Paint for Kitchen Cabinets Matters Kitchen cabinets take a beating every single day. Heat from the stove, steam from boiling water, grease splatter, and hands opening and closing doors hundreds of times a week all of this wears down a weak finish fast. Regular wall paint was not made for this. It stays soft, absorbs grease, and starts peeling near hinges within months. The right cabinet paint bonds hard to the surface, resists moisture, and wipes clean without breaking down. Choosing wrong means repainting in a year. Choosing right means a finish that looks good for five to ten years with basic care. What Is the Best Paint for Kitchen Cabinets? The best kitchen cabinet paint is a urethane trim enamel or water-based alkyd enamel. These are made for hard surfaces like cabinets, doors, and trim. They cure into a tough shell that regular latex paint simply cannot match. Here is what makes them stand out: They self-level, meaning brush marks and roller texture flatten out as the paint dries They cure hard, resisting scratches, dents, and scuffs They clean up with soap and water They resist yellowing, especially in white and light colors The two most trusted options among professional painters are Sherwin-Williams Emerald Urethane Trim Enamel and Benjamin Moore Advance. Both deliver a factory-smooth finish when applied correctly. For most homeowners, Sherwin-Williams Emerald Urethane Trim Enamel is the top pick. It performs like an oil paint but cleans up with water. It is what many pros reach for on high-end cabinet jobs and it is the paint we recommend most at Prestigious Custom Cabinets. You can read about: How Much Does It Cost to Paint Kitchen Cabinets Oil vs Water-Based Paint: Which Is Better for Cabinets? This is one of the most common questions we get. Here is a clear breakdown: Feature Oil-Based Paint Water-Based Enamel Dry time 24+ hours between coats 4 hours between coats Yellowing Yes, over time No (urethane formula) Cleanup Mineral spirits needed Soap and water VOCs High Low Finish hardness Very hard Nearly identical Best for Old cabinets with existing oil paint Most modern kitchens Oil-based paint was the standard for decades. It levels beautifully and dries extremely hard. The problem is the long dry time, strong fumes, and the fact that it yellows especially in low-light kitchens. Water-based urethane and alkyd enamels have closed the gap almost completely. Modern formulas are just as hard, just as durable, and they do not yellow. They are also far easier to work with indoors. The one case where oil still makes sense: if your cabinets already have existing oil-based paint on them, stick with oil or use an oil-compatible bonding primer before switching. Adhesion matters more than anything else. How and Why to Use Sherwin-Williams Emerald Urethane Trim Enamel Sherwin-Williams Emerald Urethane Trim Enamel is hands-down the best paint for cabinet doors and cabinet boxes in our experience. Here is why professionals and serious DIYers keep coming back to it: It self-levels beautifully. Brush marks and roller texture flatten out on their own as it dries. You do not need a sprayer to get a smooth finish, though spraying gives the best results. It cures rock hard. After a full 7-day cure, the surface resists scratches, scuffs, and cleaning chemicals without breaking down. It is not yellow. In white and off-white colors, this matters a lot. Many oil paints turn yellow in cabinets near windows or in darker areas. The urethane formula prevents this. It is water-based. Cleanup with soap and water. Dry time of around 4 hours between coats. Low odor for an indoor project. It is available in any color. Any Sherwin-Williams color swatch can be mixed into this formula. How to use it step by step: Degrease all surfaces with TSP or a dedicated degreaser Sand with 150-grit, then 220-grit to scuff the surface Wipe away all dust with a tack cloth Apply a bonding primer shellac-based or water-based bonding primer works well Sand the primer lightly with 220-grit once dry Apply two thin coats of Emerald Urethane, sanding lightly between coats Allow 7 full days before heavy use or closing cabinet doors One tip: do not over-thin the paint. A small amount of water (no more than 10%) is fine for spraying, but over-thinning weakens the finish. Other Popular Cabinet Paint Options to Consider If you want to compare before deciding, here are four solid alternatives: Benjamin Moore Advance is a waterborne alkyd paint that levels smoothly and dries hard. It is a favorite among professional painters who want an oil-like finish without the cleanup hassle. The main downside is the dry time 16 hours between coats versus 4 hours for Sherwin-Williams. Dutch Boy Cabinet, Door and Trim Alkyd Enamel is the best budget paint for kitchen cabinets. At roughly half the price of Sherwin-Williams, it still performs surprisingly well. Brushes nicely, levels well, and dries to a scratch-resistant finish. If you are working with a tight budget, this is the one to try. Insl-X Cabinet Coat Urethane Acrylic is another strong performer for brushing and rolling. It is harder to spray than Sherwin-Williams but gives excellent durability when rolled on with a high-density foam roller. General Finishes Milk Paint works well for a matte, furniture-style look. It does not require primer in most cases, which saves time. For kitchen use, we always recommend adding a clear water-based topcoat for extra protection. What Sheen Is Best for Kitchen Cabinets? Sheen affects

Is $10000 Enough for a Kitchen Remodel
kitchen remodel, Custom Cabinets

Is $10000 Enough for a Kitchen Remodel? 2026 Guide

A kitchen remodel is one of the most requested home upgrades and one of the most misunderstood in terms of cost. People see beautiful before-and-after photos online and assume a total transformation is always within reach. The reality is more nuanced, and your budget determines everything about what’s possible. So, is $10000 enough for a kitchen remodel? Yes but only if you’re strategic about where the money goes. A $10000 budget can deliver a genuinely transformed kitchen when focused on cabinets, countertops, and hardware. This guide shows you exactly how to make that budget work and where it runs out fast if you’re not careful. Is $10000 Sufficient for a Kitchen Cabinet Remodel? Let’s be direct about what $10000 gets you in today’s market. For a full gut renovation with new layout, appliances, flooring, plumbing, and electrical work no, $10000 is not enough. The national average for a mid-range full kitchen remodel runs $25,000 to $50,000. But for a kitchen remodeling project focused specifically on cabinets, countertops, and cosmetic upgrades $10000 is a real and workable budget. Many homeowners in kitchen renovations projects across Long Island and beyond achieve meaningful transformations at this price point by making smart choices about materials, scope, and contractor selection. Here’s what $10000 realistically covers: Semi-custom or stock cabinet replacement in a small to medium kitchen Laminate or mid-range quartz countertops New hardware and fixtures Paint and cosmetic updates Basic professional installation Here’s what it typically does not cover: Full appliance replacement Flooring Electrical or plumbing rerouting Layout changes High-end custom cabinetry The key is knowing the difference before you start spending. What Does a Kitchen Cabinet Remodel Include? When people talk about kitchen remodeling at the $10000 level, they’re almost always talking about a cabinet-focused refresh not a structural renovation. Here’s what that typically includes: Cabinet Options at This Budget Stock cabinets — Pre-made in standard sizes. Available at home improvement stores. The most affordable option, ranging from $50 to $200 per linear foot installed. A 10-foot kitchen run costs roughly $1,500 to $4,000 for stock cabinets fully installed. Semi-custom cabinets — More size and finish options than stock. Slight premium in price. Typically $150 to $350 per linear foot installed. A medium kitchen can work within budget if the layout is kept simple. Refacing — Instead of replacing cabinets, you replace only the doors and drawer fronts, and apply new veneer to the box frames. Costs 30% to 50% less than full replacement. A great way to stretch $10000 further. Painting existing cabinets — The most budget-friendly option at $1,000 to $3,500 professionally done. Gets you a completely different look without touching the boxes or doors. Countertops at This Budget Laminate: $15 to $40 per sq ft installed. Leaves plenty of room in the budget. Butcher block: $35 to $70 per sq ft installed. Warm, natural look. Quartz (entry to mid-range): $50 to $90 per sq ft installed. Possible in smaller kitchens. Granite remnants: $40 to $80 per sq ft. Unique options at lower prices. Additional Upgrades That Fit This Budget New sink and faucet: $200 to $600 Under-cabinet lighting: $150 to $400 New cabinet hardware: $100 to $400 Tile backsplash: $400 to $1,200 Fresh paint: $300 to $800 Kitchen Remodel Under $10000 Case Studies Real examples make budgets concrete. Here are three representative projects: Case Study 1: Small Kitchen Cabinet Refresh — $7,800 Kitchen size: 12 linear feet of cabinetry Scope: Cabinet refacing with new shaker-style doors, new laminate countertops, updated hardware, painted walls, new faucet Result: Completely different kitchen, same layout, no structural changes Total spend: $7,800 This left $2,200 in the budget for unexpected costs or a future backsplash addition. Case Study 2: Medium Kitchen Stock Cabinet Replacement — $9,500 Kitchen size: 18 linear feet of cabinetry Scope: Full stock cabinet replacement in white shaker style, new quartz countertop remnants, undermount sink, LED under-cabinet lighting, new hardware Result: Fresh, modern kitchen with significant functional improvement Total spend: $9,500 Every dollar of the $10000 budget was put to work with no room for surprises. Case Study 3: Cosmetic Kitchen Overhaul — $5,200 Kitchen size: 14 linear feet of cabinetry Scope: Professional cabinet painting (two-tone), new hardware throughout, new butcher block countertop on island only, fresh paint, new light fixture Result: Dramatically updated look at well under budget Total spend: $5,200 This is the power of focusing on high-impact, lower-cost changes. Factors to Consider for a $10000 Kitchen Cabinet Remodel Before you finalize your plan, these variables will shape your final number. Kitchen size. More linear feet of cabinetry means higher material and labor costs. A galley kitchen or small L-shaped layout is more achievable at $10000 than a large U-shaped kitchen with an island. Cabinet choice. Stock vs. semi-custom vs. custom is the single biggest cost variable in any kitchen remodel near Long Island or anywhere else. Custom cabinets alone can consume an entire $10000 budget on a small kitchen. Countertop material. Laminate and butcher block keep the budget intact. Mid-range quartz is possible in smaller kitchens. Premium stone will push you over $10000 in most cases. Labor costs. Kitchen renovations in the Long Island area tend to run higher than national averages due to regional labor rates. Budget 30% to 40% of your total for labor when planning. What you keep. Every appliance, fixture, or cabinet you keep saves money. Reusing the existing dishwasher, refrigerator, and range removes thousands from the project cost. Layout changes. Moving a sink or changing cabinet configurations requires plumbing and carpentry work. Even minor layout adjustments add $500 to $2,000 to the cost. Keep the layout the same if $10000 is a firm limit. Permit requirements. Structural changes require permits. In most Long Island municipalities, a cosmetic cabinet replacement does not. But adding electrical outlets or moving plumbing does. Factor $150 to $500 for permits if applicable. Working With a Designer to Keep Your $10000 Kitchen Remodel Budget Many homeowners skip the designer to save money. That’s often a mistake that ends up costing

how to build a bathroom vanity
Bathroom Vanity, Custom Cabinets

How to Build a Bathroom Vanity From Scratch

A bathroom vanity does two jobs: it stores your stuff and sets the tone for the whole room. Buying one off the shelf is easy, but it rarely fits your space or style perfectly. Building your own gives you full control over size, finish, and storage. If you want to know how to build a bathroom vanity from scratch, this guide walks you through every step. No fluff, no guesswork, just clear instructions that work. Step 1: Plan Your Bathroom Vanity Before you cut a single board, measure your bathroom. Write down the width, height, and depth you need. Most vanities are 21 to 24 inches deep and 32 to 36 inches tall. Ask yourself: Do you want drawers, doors, or open shelves? Will you use a drop-in or undermount sink? What finish matches your bathroom tile and fixtures? Sketch a simple drawing with dimensions. This saves you time and money later. If you want to design your own bathroom vanity, this planning step is where it all begins. Pro tip: Add 1.5 inches to your height for the countertop thickness. Gather Tools and Materials You do not need a full woodworking shop. Here is what you need: Tools: Circular saw or miter saw Drill and drill bits Pocket hole jig (Kreg jig works great) Clamps Tape measure and square Sandpaper (80, 120, and 220 grit) Level Materials: 3/4-inch plywood (birch or maple for a clean look) 1×3 or 1×4 boards for the face frame Wood screws and pocket screws Wood glue Cabinet hinges and drawer slides Sandable primer and paint or stain Buy a little extra material. Mistakes happen, and you do not want to stop mid-build for a hardware store run. Build the Vanity Frame The frame is the skeleton of your vanity. Cut your plywood pieces to size: two side panels, a top, a bottom, and a back panel. Use a pocket hole jig to join the pieces. This method is fast, strong, and beginner-friendly. Apply wood glue to each joint before driving the screws. Steps: Cut all pieces according to your plan. Drill pocket holes on the inside edges. Attach the bottom panel to both side panels. Add the top panel the same way. Square up the box with a framing square. Glue and nail the back panel in place. Check for squares at every step. A crooked box will cause problems with every step that follows. Add the Face Frame The face frame covers the raw edges of your plywood box. It gives your vanity a finished, furniture-grade look. Cut 1×2 or 1×3 boards for the face frame pieces. You need two vertical stiles (the sides) and horizontal rails (top and bottom, plus any middle pieces). Join them with pocket screws. Then glue and clamp the face frame to the front of your box. Pre-drill pilot holes to avoid splitting the wood. Once it is dry, sand the joints flush. This is one of those steps that separates a good-looking vanity from a great one. Install Shelves or Dividers If your vanity has an open cabinet section, add a shelf. Cut a piece of plywood to fit inside the box. You can use shelf pin holes for an adjustable shelf drill two rows of evenly spaced holes on each side panel. For vanities with two doors, a center divider adds strength and gives each side its own storage zone. Attach it with pocket screws from the top and bottom panels. Keep shelves level. Use a level before drilling any holes. Build and Attach Drawers (Optional) Drawers take more time, but they make a vanity far more useful. Each drawer has five parts: a front, back, two sides, and a bottom. Use 1/2-inch plywood for the box. Cut the pieces and join them with pocket screws and wood glue. The bottom panel slides into a dado (a groove cut into the sides) or simply glues to the bottom. Install drawer slides before placing the drawer in the cabinet. Undermount slides look clean and work smoothly. Full-extension slides let you access the full depth of the drawer. Attach a false drawer front last. This covers the drawer box and matches the door style. Install Cabinet Doors Measure the door opening carefully. Cut your door panels from 3/4-inch plywood or MDF. For a simple look, flat-panel doors work great. For something more detailed, add a routed profile around the edge. Use soft-close concealed hinges. They are easy to install, easy to adjust, and they last for years. Most require a 35mm hole drilled into the back of the door; a Forstner bit makes this easy. Hang the doors and adjust the hinges until the gap is even on all sides. Usually 1/8 inch all around looks clean and professional. Sand and Finish This step makes or breaks your project. Sand the entire vanity frame, doors, drawers with 120 grit first, then 220 grit. Wipe off all dust with a tack cloth. For paint: Apply a sandable primer. Let it dry. Sand lightly with 220 grit. Apply two coats of semi-gloss or satin paint. Sand between coats with 320 grit for a smooth finish. For stain: Apply a pre-stain conditioner on pine or poplar. Wipe on the stain, let it sit, and wipe off the excess. Finish with two coats of polyurethane. The finish is what people notice first. Take your time here. You can read about: How to Build Kitchen Cupboards Install the Countertop and Sink This is where your vanity starts to look like a real piece of furniture. Countertop options: Butcher block (warm, DIY-friendly) Quartz or granite (durable, premium look) Tile (budget-friendly) Concrete (industrial, custom) Cut a hole for the sink if using a drop-in model. Follow the template that comes with your sink. For an undermount sink, attach it from below with epoxy and mounting clips. Apply silicone caulk around the sink and along the back edge of the countertop where it meets the wall. This keeps water out of the cabinet. Mount the

how much does it cost to install countertops
Countertops, Custom Cabinets

How Much Does It Cost to Install Countertops? | Cost Guide

Replacing countertops is one of the most impactful kitchen upgrades you can make. New surfaces change how the whole room looks and feels and they hold up better under daily use than worn or damaged ones. The problem is most people have no idea what the real cost looks like until they’re already talking to a contractor. So, how much does it cost to install countertops? For most kitchens, expect to pay between $1,500 and $5,000 total materials and labor included. Higher-end materials like quartzite or marble can push that figure well past $10,000. This guide breaks down every number so you can budget with confidence and avoid surprises. Quick Answer: How Much Does Countertop Installation Cost? Here’s the short version for anyone who needs a fast number: Budget materials (laminate, tile): $15 – $40 per square foot installed Mid-range (quartz, solid surface): $50 – $100 per square foot installed Premium (granite, marble, quartzite): $80 – $200+ per square foot installed Average kitchen total: $1,500 – $5,500 Labor only: $35 – $85 per hour, or $200 – $500 per project The biggest variables are material choice and kitchen size. A 40-square-foot kitchen in laminate costs very differently than a 70-square-foot kitchen in marble. Average Countertop Installation Cost in 2026 The national average for a full countertop replacement in a standard kitchen runs between $2,500 and $4,500. That figure covers: Removal of existing countertops New material (slab or tiles, cut to size) Professional installation and finishing Basic edge profiling It does not usually cover plumbing disconnection and reconnection, backsplash work, or cabinet repairs underneath. How much do new countertops cost for a small kitchen? A 25 to 35 square foot kitchen with quartz countertops typically runs $1,800 to $3,200 fully installed. A large 60 to 80 square foot kitchen in the same material can reach $4,500 to $7,500. The countertop renovation cost jumps significantly when you add an island, choose premium stone, or request decorative edge profiles. Countertop Installation Cost Per Square Foot by Material Material is the single biggest cost driver. Here’s a realistic breakdown of installed price per square foot for 2026: Material Cost Per Sq Ft (Installed) Lifespan Maintenance Laminate $15 – $40 10–20 years Very low Ceramic tile $20 – $45 20+ years Low (grout needs care) Butcher block $35 – $70 20+ years Medium (oiling required) Solid surface (Corian) $45 – $85 15–20 years Low Quartz (engineered) $50 – $120 25+ years Very low Granite $60 – $150 25–50+ years Low (sealing needed) Marble $75 – $200 25+ years High (seals, etching) Quartzite $80 – $200+ 25+ years Low (sealing needed) Soapstone $70 – $150 25+ years Medium (oiling) Concrete $65 – $140 15–25 years Medium (sealing) Porcelain slab $55 – $120 25+ years Very low These prices include fabrication and installation. Material-only prices are lower, but you still need to pay for cutting, edge work, and mounting. Countertop Installation Cost by Countertop Type Beyond material, the countertop configuration affects total cost to replace countertops. Standard straight run: The simplest layout. One continuous surface along one wall. Lowest installation cost for a given material. L-shaped kitchen: Two walls of countertop with a corner joint. Requires a mitered or seamed corner. Adds $50 to $200 to the total. U-shaped kitchen: Three walls. Two corner joints. Most countertop square footage of any standard layout. Expect 20% to 40% more material cost than a straight run. Island countertop: Priced separately. Typically 15 to 30 square feet. Full slab islands with waterfall edges can cost $1,000 to $4,000+ depending on material. Waterfall edge: The countertop material wraps over the side of the cabinet all the way to the floor. Beautiful, expensive. Adds $500 to $2,500 per side depending on slab cost. Peninsula: Similar to an island but connected to a wall on one side. Easier to fabricate than a full island; slightly less expensive. Countertop Labor Cost: What Professionals Charge Labor for countertop installation is charged in one of three ways: hourly, per project, or per linear foot. Hourly rate: $35 – $85 per hour. Most contractors work faster than homeowners expect — a standard kitchen takes 3 to 6 hours of installation time. Per project flat rate: $200 – $600 for a standard kitchen. Higher for complex layouts, heavy materials, or multiple cutouts (sinks, cooktops). Per linear foot: $30 – $70 per linear foot. Common for fabricators who charge separately for material and labor. What affects labor cost: Cutouts. Every sink, cooktop, or prep sink requires a cutout. Each adds $75 to $200 to the labor total. Seams. Longer countertops need seams where slabs meet. Each seam adds $50 to $150. Edge profiles. A basic eased edge is usually free. Ogee, bullnose, or waterfall profiles cost $10 to $30 per linear foot extra. Backsplash removal. If the existing backsplash is attached to the old countertop, removing it without wall damage adds time and cost. Countertop weight. Granite and quartzite slabs are heavy. Moving and positioning them requires more workers or special equipment. Factors That Affect Countertop Installation Costs Several things push the final number up or down: Kitchen size. More square footage means more material and more labor. This is the most straightforward factor. Material choice. A $15/sq ft laminate and a $150/sq ft marble slab don’t just differ in beauty — they differ in fabrication complexity, handling, and installation time. Number of cutouts. Each sink or appliance cutout adds to the total. A kitchen with a farmhouse sink, a prep sink, and an undermount cooktop requires three separate cutouts. Edge profile. Fancy edges take longer to fabricate and polish. A simple square edge is cheapest; ogee and mitered edges cost more. Existing countertop removal. Removing the old surface costs $50 to $200 depending on material and how it was attached. Some installers include this; others charge separately. Plumbing. Disconnecting and reconnecting the sink plumbing is not usually part of a countertop installation. Budget $75 to $200 for a plumber to handle this separately. Geographic location. Labor rates

how much does closets by design cost
Closets, Custom Cabinets

How Much Does Closets by Design Cost? Real Prices

Closets by Design is one of the most recognized custom closet companies in the United States. They offer in-home consultations, professional design, and full installation. But before booking that free consultation, most homeowners want to know one thing: what’s this actually going to cost? How much does Closets by Design cost? Most projects fall between $1,000 and $5,000, with walk-in closets averaging $2,000 to $6,000 or more depending on size and features. This guide breaks down the real pricing by collection, closet type, and hidden extras so you know exactly what to expect before you spend a dime. Average Closets by Design Cost (2026 Guide) Closets by Design doesn’t publish a fixed price list. Pricing is custom and varies based on your closet size, the collection you choose, the accessories you add, and your location. That said, here are realistic average ranges based on reported homeowner experiences and project types: Closet Type Average Cost Range Small reach-in closet $500 – $1,500 Standard reach-in closet $1,000 – $2,500 Small walk-in closet $1,500 – $3,500 Large walk-in closet $3,000 – $8,000+ Master bedroom walk-in $4,000 – $10,000+ Home office $1,500 – $4,000 Garage storage system $2,000 – $6,000 Pantry organization $800 – $2,500 Murphy bed with closet $3,000 – $7,000 These ranges include design, materials, and installation. They don’t include any upgrades like soft-close hardware, LED lighting, or premium finishes that add to the total. How much does Closets by Design cost for a basic project? Entry-level reach-in setups start around $500 to $800, but most homeowners end up spending more once they see the design options available. Closets by Design Cost by Collection Closets by Design offers several product lines at different price points. The collection you choose has the biggest single impact on your total closets by design cost. Classic Collection Their entry-level line. Clean, simple design. White or off-white finish. Laminate shelving with basic hardware. Good for functional storage without visual flair. Average cost per linear foot: $75 – $120 Best for: Guest room closets, kids’ closets, basic reach-ins Contemporary Collection Mid-range. More finish options including gray, espresso, and natural wood tones. Thicker shelving, better drawer boxes, and more accessory compatibility. Average cost per linear foot: $120 – $180 Best for: Master bedroom closets, home offices, pantries Premium Collection Top-tier materials. Furniture-grade finishes. Dovetail drawer construction. Full-extension soft-close slides. Closest to custom cabinetry quality. Average cost per linear foot: $180 – $300+ Best for: Luxury master walk-ins, high-end renovations Murphy Beds Closets by Design also offers wall bed systems, sometimes combined with closet and desk units. These are priced separately: Basic wall bed: $3,000 – $5,000 Wall bed with closet and desk: $5,000 – $9,000+ Garage Systems Wire shelving and laminate systems designed for garage use. These are priced lower than bedroom closets: Basic wire garage system: $800 – $2,000 Full laminate garage storage: $2,500 – $6,000 Factors That Affect Closets by Design Pricing Understanding closet by design pricing requires knowing what drives the final number up or down. Closet Size The biggest cost driver. More square footage means more shelving, more hardware, and more installation time. A 6-foot reach-in costs a fraction of a 12-by-10-foot walk-in. Collection/Material Choice As shown above, the collection you pick can double or triple the per-foot cost. Choosing premium materials on a large walk-in quickly reaches five figures. The number of accessories add up fast. Common add-ons and approximate costs: Soft-close drawer slides: $20 – $40 per drawer Pull-out shoe shelves: $80 – $150 each Valet rods: $30 – $60 LED lighting strips: $100 – $300 Belt/tie racks: $40 – $80 Hamper inserts: $100 – $200 Glass-front drawers: $150 – $300 each Jewelry drawers with felt lining: $200 – $400 The number of drawers cost significantly more than shelves. A unit with 8 drawers can cost $400 to $1,200 more than an identical unit with shelves only. Custom vs. Standard Sizes If your closet has an unusual shape, angled ceiling, or irregular dimensions, custom sizing adds cost. Standard configurations are less expensive. Location and Market Closets by Design franchises operate across the country. Labor rates vary by region. The same design in New York will cost more than in a lower cost-of-living market. Promotions and Discounts Closets by Design frequently run promotions 40% to 50% off is common. These deals are real, not inflated from a fake original price. Timing your purchase to a sale can save hundreds or thousands. Real-Life Closets by Design Cost Examples These are representative examples based on typical homeowner project types: Example 1: Standard master bedroom reach-in Size: 8 feet wide, single rod and shelf setup. Mid-range collection. Added: 4 drawers, 2 pull-out shoe shelves. Total: approximately $2,200 – $2,800 Example 2: Small walk-in closet Size: 7 x 6 feet. Contemporary collection. Double hanging on one wall, shelving on two sides, 6 drawers, LED lighting. Total: approximately $3,500 – $4,500 Example 3: Large master walk-in Size: 12 x 10 feet. Premium collection. Island with drawers, full mirror, jewelry inserts, soft-close everywhere. Total: approximately $8,000 – $12,000 Example 4: Home office Size: One wall, 10 feet wide. Contemporary collection. Desk surface, shelving above, 3 lateral file drawers. Total: approximately $2,500 – $3,800 Example 5: Garage storage Size: Two-car garage, full back wall and one side wall. Laminate cabinets and shelving. Total: approximately $4,000 – $6,500 Closets by Design vs. California Closets These two companies compete directly for the same customer. Here’s how they compare on price and product: Factor Closets by Design California Closets Starting price (reach-in) ~$500 ~$1,000 Average walk-in cost $2,000 – $6,000 $3,000 – $8,000+ Free consultation Yes Yes In-home design Yes Yes Material quality Good to excellent Excellent Promotions Frequent (40–50% off) Less frequent Customization level High Very high Brand recognition Strong Very strong Is Closets by Design expensive compared to California Closets? Generally, Closets by Design comes in slightly lower on comparable projects especially when purchased during a promotion. California Closets tends to offer a wider range of ultra-premium finishes and has a