
Prestigious Custom Cabinets

Bathroom Vanity

what is a bathroom vanity
Custom Cabinets, Bathroom Vanity

What Is a Bathroom Vanity? Types, Parts & Tips

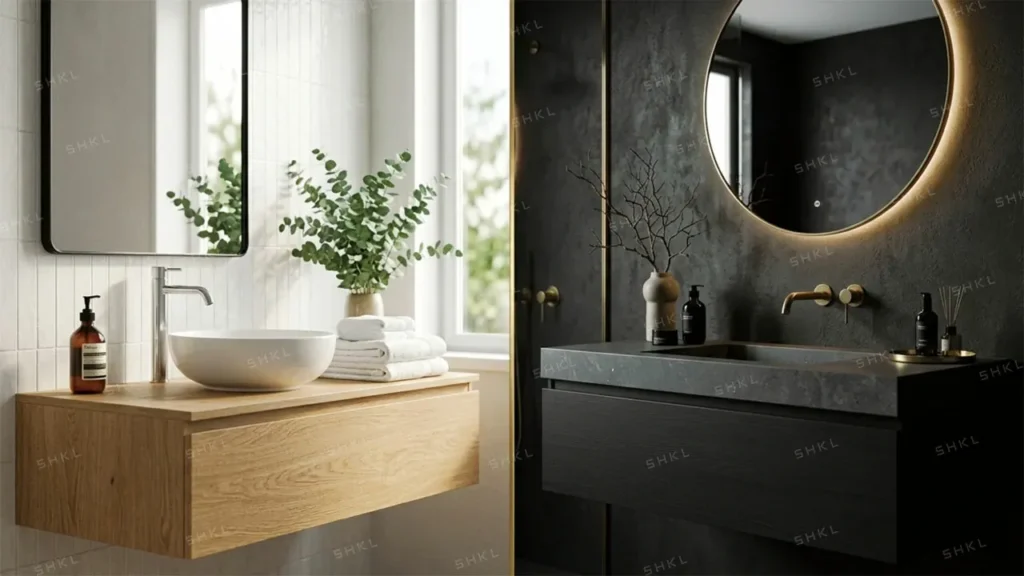
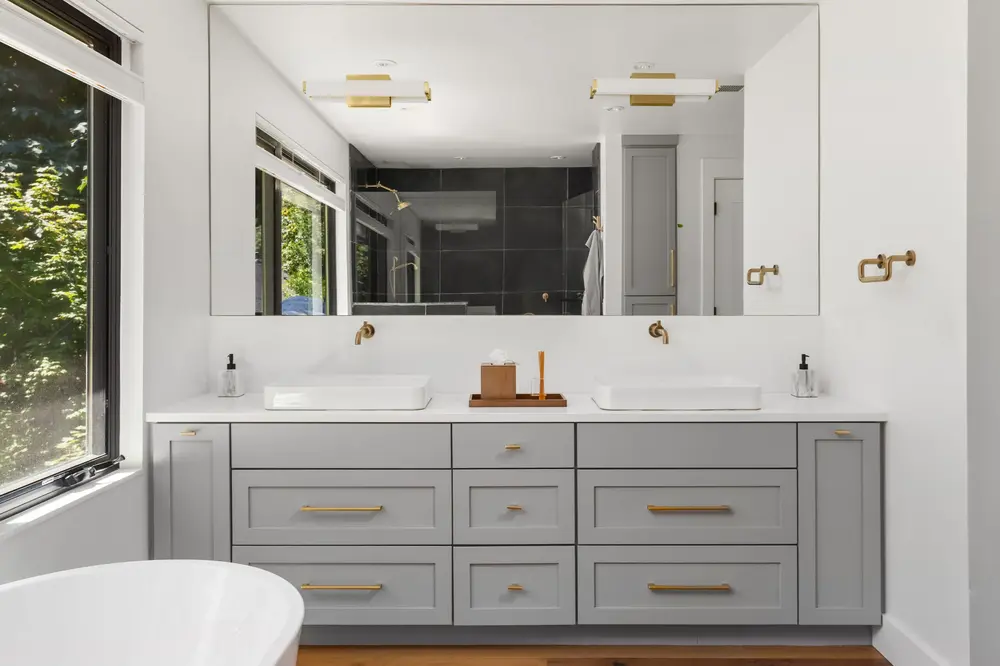
If you’re planning a bathroom remodel or just curious about the basics, the vanity is the one fixture that ties the whole room together. It holds the sink, provides storage, and sets the visual tone for the entire space. Most people use one every day without thinking about it much. So, what is a bathroom vanity? It’s a cabinet unit that combines a sink, countertop, and storage into one piece. It’s not just decorative, it’s one of the hardest-working fixtures in your home. This guide covers everything you need to know, from components to styles to how to pick the right one. What Is a Vanity in a Bathroom? Let’s start with a clear bathroom vanity definition. A bathroom vanity is a freestanding or wall-mounted cabinet that houses a sink and usually a countertop. It sits against a bathroom wall and serves two purposes: plumbing function and storage. It’s where the sink drain and water supply lines connect, and it’s also where you store toiletries, cleaning supplies, and daily essentials. The bathroom vanity meaning goes a bit beyond just “a cabinet with a sink.” It’s the anchor of the bathroom. In most homes, it’s the first thing you notice when you walk in. It influences the style, feel, and functionality of the entire room. What is vanity in bathroom design terms? It’s a built unit not just the cabinet, not just the sink, but the whole combination working together. Some vanities come with mirrors or light fixtures above them as part of a complete vanity set. To define a vanity bathroom simply: it’s a cabinet plus sink plus countertop, built to handle daily grooming, storage, and plumbing all in one place. Main Components of a Bathroom Vanity Understanding the parts helps you make better buying and design decisions. Here’s what makes up a full vanity unit: 1. The Cabinet (Vanity Base) This is the main body, the wooden or MDF structure that holds everything else. It contains the doors, drawers, and interior shelving. Cabinet quality varies a lot. Solid wood holds up better in humid environments than particleboard. 2. The Countertop Sits on top of the cabinet. The countertop surrounds the sink and provides workspace. Common materials include: Marble — elegant and heat-resistant, but requires sealing Granite — durable and unique, great for high-use bathrooms Quartz — engineered, non-porous, low maintenance Laminate — budget-friendly but less durable long term Concrete — custom, industrial look, requires sealing Cultured marble — affordable and available in many colors 3. The Sink (Basin) The sink is integrated into or set on the countertop. There are several sink styles: Undermount — installed beneath the countertop for a clean look Drop-in (top-mount) — sits in a hole cut into the counter Vessel — sits on top of the counter like a bowl Integrated — sink and countertop are one continuous piece 4. The Faucet May or may not come with the vanity. Faucets attach through holes in the countertop or sink. Styles include single-hole, widespread (3-hole), and wall-mounted. 5. Doors and Drawers These are the storage elements. Soft-close hinges, full-extension drawer slides, and dovetail joints are signs of quality construction. Better hardware means longer life. 6. Plumbing Connections Inside the cabinet, the drain line and supply lines connect to the sink. A cutout in the back of the cabinet allows pipes to pass through. 7. The Mirror or Medicine Cabinet Not always included, but often sold as part of a vanity set. A mirror above the vanity completes the grooming station. Medicine cabinets add recessed storage behind the mirror. Types of Bathroom Vanities There’s no single right type; it depends on your bathroom size, style, and storage needs. Freestanding Vanity The most common type. Sits on the floor with four legs or a solid base. Easy to install and replace. Available in every size and style. Good for most bathrooms. Floating (Wall-Mounted) Vanity Mounted directly to the wall with no floor contact. Creates a modern, open look. Makes the floor easier to clean. Requires wall blocking or a sturdy wall structure to support the weight. Single Sink Vanity One sink, one cabinet. Ideal for smaller bathrooms or single-user spaces. Widths typically range from 24 to 48 inches. Double Sink Vanity Two sinks, wider cabinet. Ranges from 60 to 72 inches wide. Best for shared bathrooms or master baths. Needs more wall space and two sets of plumbing connections. Vessel Sink Vanity Designed specifically to pair with a vessel (above-counter) sink. The cabinet is lower than standard, usually 31 to 33 inches to account for the sink height sitting on top. Corner Vanity Built to fit into a corner. Space-saving solution for very small bathrooms or powder rooms. Typically triangular or angled in shape. Custom Vanity Built to exact specifications. You choose the dimensions, materials, finish, hardware, and layout. Best for unusual spaces or high-end remodels. Benefits of a Bathroom Vanity Why does every bathroom have one? Because it solves several problems at once. Storage. Bathrooms are small. A vanity hides pipes, stores supplies, and keeps countertops clear. Drawers and cabinets keep everything organized and out of sight. Plumbing concealment. Without a vanity cabinet, your sink’s drain and supply lines are fully exposed. The vanity base hides all of that cleanly. Countertop workspace. A flat surface next to the sink matters. You need space to set things down while getting ready. Vanity countertops provide that. Style impact. The vanity is usually the largest piece of furniture in a bathroom. Changing it transforms the whole look of the room without a full renovation. Resale value. Updated bathrooms are a strong selling point. A modern, well-installed vanity is one of the most cost-effective upgrades for resale. Hygiene. A good vanity keeps moisture-prone items (soap, razors, medications) off the floor and in contained, dry spaces. You can read about: How to Build a Bathroom Vanity How to Choose the Right Bathroom Vanity There’s a lot to consider. Here’s how to make a smart decision. Step 1: Measure Your Space
how much does it cost to install a bathroom vanity
Bathroom Vanity, Custom Cabinets

How Much Does It Cost to Install a Bathroom Vanity | Guide

Replacing a bathroom vanity is one of the smartest upgrades you can make. It changes how the room looks, adds storage, and fixes the daily frustrations of a worn-out fixture all without gutting the entire bathroom. Most homeowners are surprised by how wide the price range is until they understand what drives it. So, how much does it cost to install a bathroom vanity? In 2026, most homeowners pay between $300 and $3,800 total vanity unit plus labor. The national average sits around $1,500. What you actually spend depends on vanity size, type, plumbing complexity, and your location. This guide breaks every variable down so you can budget accurately before spending a dollar. Bathroom Vanity Installation Costs in 2026 Here’s the big picture on bathroom vanity installation cost in today’s market: Project Type Total Cost Range Basic vanity swap (same location) $300 – $900 Standard single vanity install $800 – $1,800 Standard double vanity install $1,200 – $3,000 Floating/wall-mounted vanity $1,000 – $2,500 Custom vanity installation $2,500 – $6,000+ Full vanity + plumbing relocation $2,000 – $5,000+ Labor only: $150 – $700 for a standard install. Plumbers charge $45 – $120 per hour for any water line or drain work. Vanity unit cost only: Budget/stock: $100 – $500 Mid-range: $500 – $1,500 Premium/custom: $1,500 – $5,000+ The cost to install bathroom vanity always has two parts: the unit itself and the labor. Never budget for just one. Bathroom Vanity Cost Breakdown by Category Understanding where each dollar goes helps you make smarter choices. Here’s a typical full-install breakdown for a mid-range single vanity: Cost Item Typical Range Vanity cabinet unit $400 – $1,200 Countertop (if separate) $150 – $600 Sink (if not included) $80 – $400 Faucet $80 – $350 Installation labor $150 – $500 Plumbing connection/adjustment $100 – $400 Old vanity removal and disposal $75 – $200 Mirror or medicine cabinet $80 – $500 Lighting fixture $50 – $300 Estimated total $1,165 – $4,450 Most mid-range projects land around $1,200 to $2,000 when all line items are accounted for. The gap between a $900 project and a $3,500 project almost always comes down to vanity quality, plumbing work, and whether you’re changing the sink location. Bathroom Vanity Costs by Type Different vanity types carry different price tags even before labor. Freestanding Vanity The most common type. Sits on four legs or a solid base. Easiest to install because it doesn’t require wall anchoring beyond standard connections. Unit cost: $200 – $2,000 Install labor: $150 – $400 Total installed: $350 – $2,400 Floating (Wall-Mounted) Vanity Mounted directly to wall studs or a blocking board. Requires locating studs and sometimes adding blocking inside the wall. More complex to install than a freestanding unit. Unit cost: $300 – $2,500 Install labor: $250 – $600 Total installed: $550 – $3,100 Vessel Sink Vanity Designed for above-counter bowl sinks. The cabinet is lower than standard (31–33 inches) to accommodate the vessel height. Faucet height also needs to match. Unit cost: $250 – $1,800 Install labor: $200 – $500 Total installed: $450 – $2,300 Double Sink Vanity Two sinks, wider cabinet (typically 60–72 inches), two sets of supply and drain connections. More material, more labor. Unit cost: $600 – $4,000 Install labor: $300 – $700 Total installed: $900 – $4,700 Custom Built-In Vanity Built to exact dimensions, often by a cabinet maker. The most expensive option but fits unusual spaces perfectly. Unit cost: $1,500 – $8,000+ Install labor: $400 – $1,200 Total installed: $1,900 – $9,200+ Vanity Installation Cost by Size and Bathroom Type Vanity size is one of the clearest cost predictors. Here’s how size maps to total installed price: Vanity Width Bathroom Type Typical Installed Cost 18″ – 24″ Powder room / half bath $400 – $1,200 30″ – 36″ Standard full bath $700 – $1,800 42″ – 48″ Master bath or larger $1,000 – $2,500 60″ (double) Master bath, shared bath $1,400 – $3,500 72″+ (double) Master suite $2,000 – $5,000+ Powder room (half bath): Typically the simplest install. No tub or shower, usually just a toilet and small vanity. Labor is straightforward. Full bathroom: More obstacles to work around tub, shower, toilet all compete for space. Measuring and maneuvering are more involved. Master bathroom: Larger vanities, often double sinks, sometimes custom dimensions. More labor time and higher material cost. Main Factors That Affect Vanity Installation Costs These are the variables that move your final number most significantly: Plumbing Location Changes Keeping the sink in the exact same location is the single biggest cost-saver. Moving a drain line costs $200 – $800 extra. Moving supply lines adds another $150 – $400. If possible, choose a vanity that matches your existing plumbing footprint. Vanity Size and Weight Larger, heavier vanities take more labor to move and position. A 72-inch double vanity often requires two installers. That extra labor adds $100 – $300 to the bill. Floating vs. Freestanding Wall-mounted vanities require locating studs or adding a blocking board inside the wall. This adds 1 to 2 hours of labor and sometimes drywall patching $150 – $350 more than a standard freestanding install. Old Vanity Removal Most installers charge $75 – $200 to demo and haul away your existing vanity. If it’s a large vanity with a cultured marble countertop, a demo can take 30 to 60 minutes and add weight to the disposal load. Countertop Type Pre-assembled vanities with integrated tops cost less to install than separate countertops requiring measurement, cutting, and seaming. Separate stone countertops (granite, quartz) add $150 – $500 to the project. Electrical Work New vanity lighting or GFCI outlet upgrades need a licensed electrician. Each new outlet or fixture runs $100 – $300 in labor. Verify whether your existing wiring meets current code before installation begins. Regional Labor Rates The bathroom vanity install cost varies significantly by geography. In high cost-of-living areas like Long Island, New York City, or San Francisco, labor runs 20% – 35% above the national average. The same install that costs $400 in labor

how to build a bathroom vanity
Bathroom Vanity, Custom Cabinets

How to Build a Bathroom Vanity From Scratch

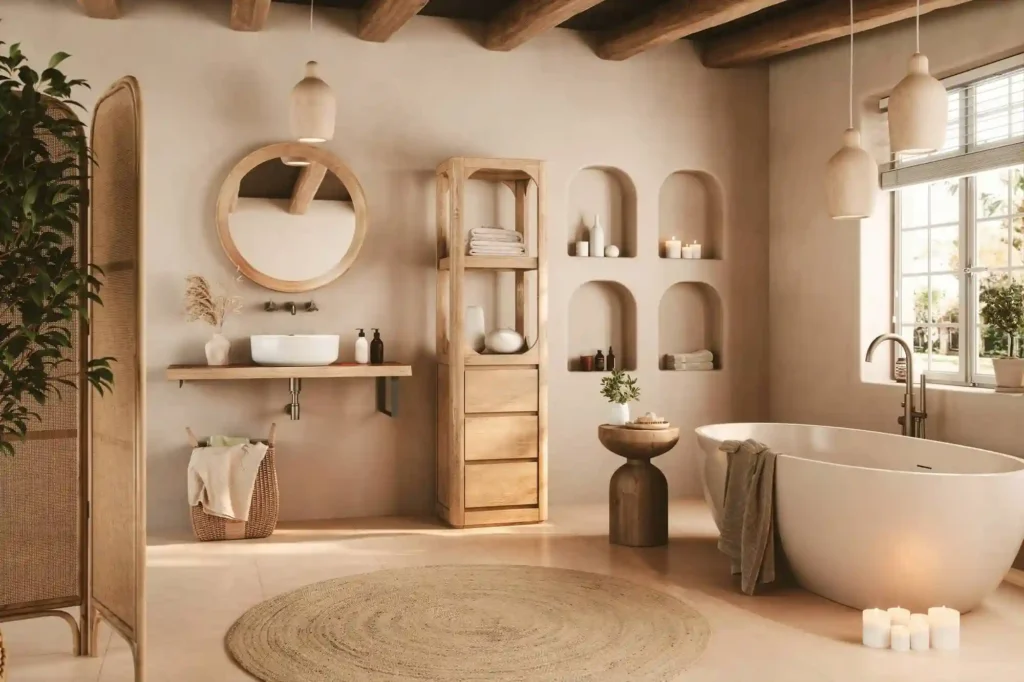
A bathroom vanity does two jobs: it stores your stuff and sets the tone for the whole room. Buying one off the shelf is easy, but it rarely fits your space or style perfectly. Building your own gives you full control over size, finish, and storage. If you want to know how to build a bathroom vanity from scratch, this guide walks you through every step. No fluff, no guesswork, just clear instructions that work. Step 1: Plan Your Bathroom Vanity Before you cut a single board, measure your bathroom. Write down the width, height, and depth you need. Most vanities are 21 to 24 inches deep and 32 to 36 inches tall. Ask yourself: Do you want drawers, doors, or open shelves? Will you use a drop-in or undermount sink? What finish matches your bathroom tile and fixtures? Sketch a simple drawing with dimensions. This saves you time and money later. If you want to design your own bathroom vanity, this planning step is where it all begins. Pro tip: Add 1.5 inches to your height for the countertop thickness. Gather Tools and Materials You do not need a full woodworking shop. Here is what you need: Tools: Circular saw or miter saw Drill and drill bits Pocket hole jig (Kreg jig works great) Clamps Tape measure and square Sandpaper (80, 120, and 220 grit) Level Materials: 3/4-inch plywood (birch or maple for a clean look) 1×3 or 1×4 boards for the face frame Wood screws and pocket screws Wood glue Cabinet hinges and drawer slides Sandable primer and paint or stain Buy a little extra material. Mistakes happen, and you do not want to stop mid-build for a hardware store run. Build the Vanity Frame The frame is the skeleton of your vanity. Cut your plywood pieces to size: two side panels, a top, a bottom, and a back panel. Use a pocket hole jig to join the pieces. This method is fast, strong, and beginner-friendly. Apply wood glue to each joint before driving the screws. Steps: Cut all pieces according to your plan. Drill pocket holes on the inside edges. Attach the bottom panel to both side panels. Add the top panel the same way. Square up the box with a framing square. Glue and nail the back panel in place. Check for squares at every step. A crooked box will cause problems with every step that follows. Add the Face Frame The face frame covers the raw edges of your plywood box. It gives your vanity a finished, furniture-grade look. Cut 1×2 or 1×3 boards for the face frame pieces. You need two vertical stiles (the sides) and horizontal rails (top and bottom, plus any middle pieces). Join them with pocket screws. Then glue and clamp the face frame to the front of your box. Pre-drill pilot holes to avoid splitting the wood. Once it is dry, sand the joints flush. This is one of those steps that separates a good-looking vanity from a great one. Install Shelves or Dividers If your vanity has an open cabinet section, add a shelf. Cut a piece of plywood to fit inside the box. You can use shelf pin holes for an adjustable shelf drill two rows of evenly spaced holes on each side panel. For vanities with two doors, a center divider adds strength and gives each side its own storage zone. Attach it with pocket screws from the top and bottom panels. Keep shelves level. Use a level before drilling any holes. Build and Attach Drawers (Optional) Drawers take more time, but they make a vanity far more useful. Each drawer has five parts: a front, back, two sides, and a bottom. Use 1/2-inch plywood for the box. Cut the pieces and join them with pocket screws and wood glue. The bottom panel slides into a dado (a groove cut into the sides) or simply glues to the bottom. Install drawer slides before placing the drawer in the cabinet. Undermount slides look clean and work smoothly. Full-extension slides let you access the full depth of the drawer. Attach a false drawer front last. This covers the drawer box and matches the door style. Install Cabinet Doors Measure the door opening carefully. Cut your door panels from 3/4-inch plywood or MDF. For a simple look, flat-panel doors work great. For something more detailed, add a routed profile around the edge. Use soft-close concealed hinges. They are easy to install, easy to adjust, and they last for years. Most require a 35mm hole drilled into the back of the door; a Forstner bit makes this easy. Hang the doors and adjust the hinges until the gap is even on all sides. Usually 1/8 inch all around looks clean and professional. Sand and Finish This step makes or breaks your project. Sand the entire vanity frame, doors, drawers with 120 grit first, then 220 grit. Wipe off all dust with a tack cloth. For paint: Apply a sandable primer. Let it dry. Sand lightly with 220 grit. Apply two coats of semi-gloss or satin paint. Sand between coats with 320 grit for a smooth finish. For stain: Apply a pre-stain conditioner on pine or poplar. Wipe on the stain, let it sit, and wipe off the excess. Finish with two coats of polyurethane. The finish is what people notice first. Take your time here. You can read about: How to Build Kitchen Cupboards Install the Countertop and Sink This is where your vanity starts to look like a real piece of furniture. Countertop options: Butcher block (warm, DIY-friendly) Quartz or granite (durable, premium look) Tile (budget-friendly) Concrete (industrial, custom) Cut a hole for the sink if using a drop-in model. Follow the template that comes with your sink. For an undermount sink, attach it from below with epoxy and mounting clips. Apply silicone caulk around the sink and along the back edge of the countertop where it meets the wall. This keeps water out of the cabinet. Mount the