Prestigious Custom Cabinets

Author name: localpro 1

how much does closets by design cost
Closets

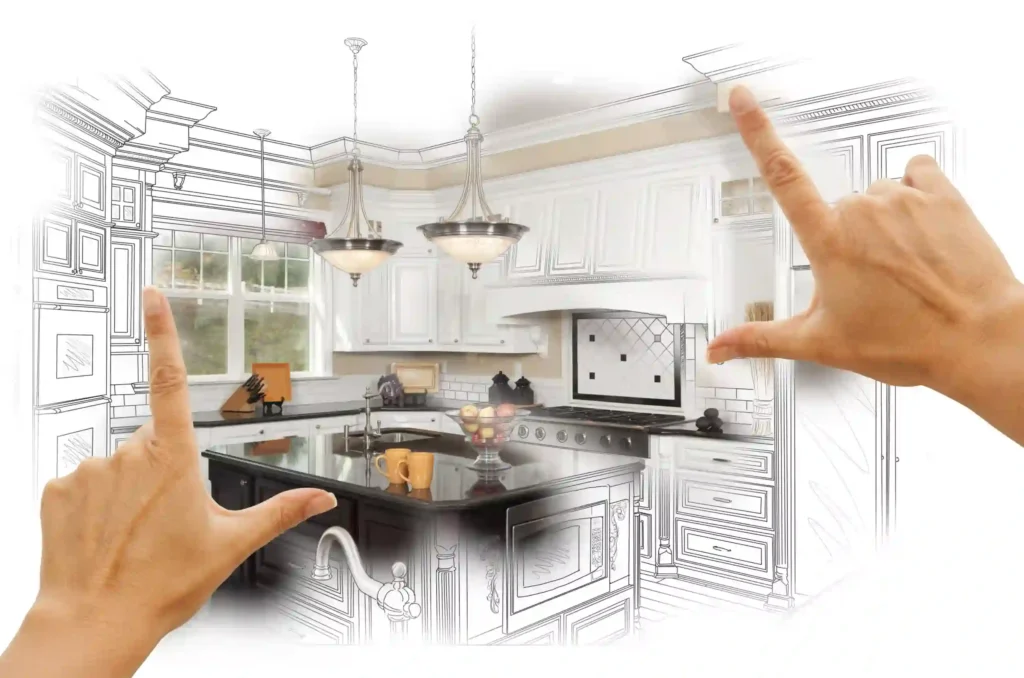
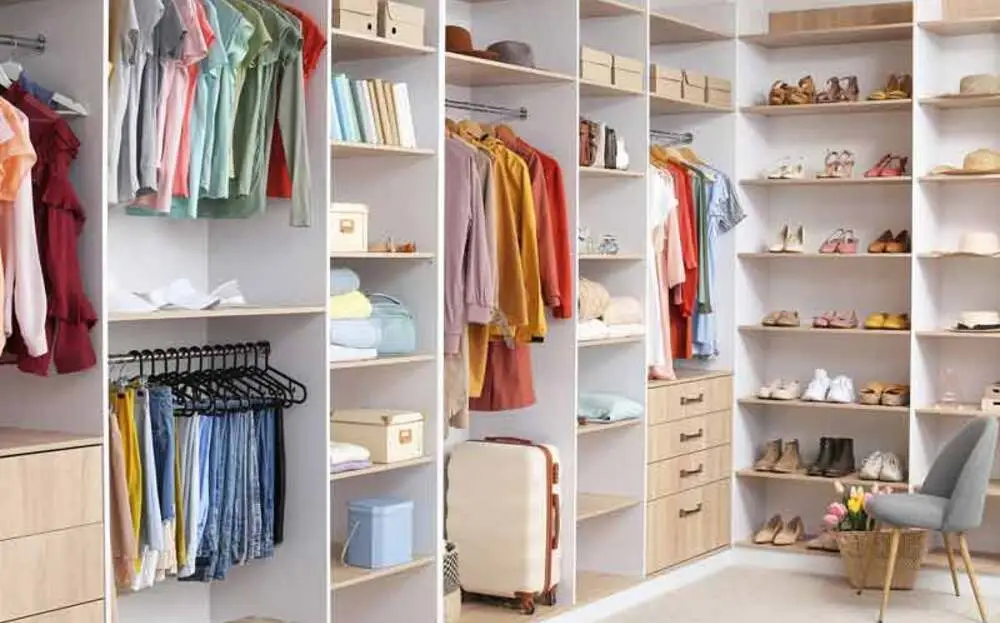
How Much Does Closets by Design Cost in 2026?

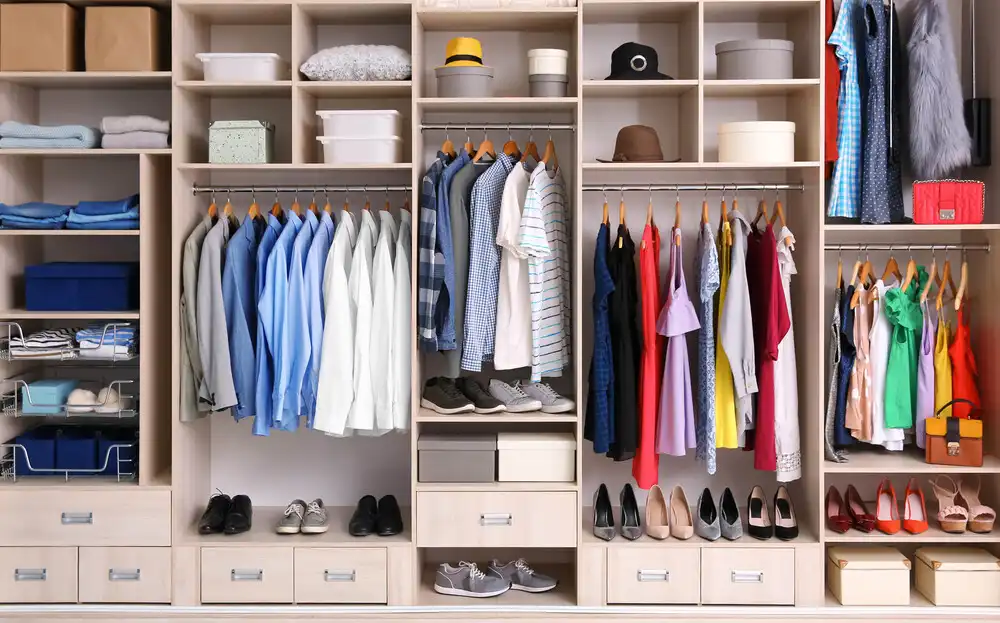
If you’re planning to upgrade your storage space, you’re likely wondering: how much does closets by design cost? The answer varies, but most homeowners can expect to pay between $1,100 and $7,000+, depending on size, materials, and customization. Many people underestimate how much added features can increase the final price.  A basic reach-in closet is affordable, while a fully customized walk-in can cost significantly more. At prestigious custom cabinets, we help homeowners balance design, functionality, and budget. This guide explains closet by design prices, key cost factors, and how to make a smart, value-driven investment for your home. Average Closets by Design Cost (2026 Breakdown) Understanding the average cost of closet remodel projects helps set realistic expectations before you start. Walk-in Closet Cost Walk-in closets are the most popular and the most variable in pricing. Typical range: $1,800 – $7,000+ Basic designs stay affordable, but premium upgrades (lighting, islands, glass doors) increase cost quickly Real insight: Most homeowners spend around $3,500–$5,000 for a well-balanced walk-in. Reach-in Closet Cost Smaller closets are more budget-friendly but still customizable. Typical range: $1,100 – $3,000 Ideal for bedrooms, hallways, or guest spaces If you’re wondering how much is it to build a closet, this is usually the starting point for entry-level projects. At prestigious custom cabinets, we often recommend starting with a reach-in design for homeowners looking to maximize value without overspending. Cost Per Linear Foot Closet Type Cost Per Linear Foot Basic $150 Mid-range $200–$300 Premium $300–$400+ This pricing model is commonly used to estimate the cost of closets by design before finalizing details. Closets by Design Cost by Collection Closets by Design offers different collections, each targeting a specific budget level. Everyday Collection (Budget Option) Laminates and simple finishes Best for rental properties or quick upgrades Lower-end closet by design prices Classic Collection (Mid-range) Better finishes and durability Balanced option for most homeowners Most popular choice for the average cost of closet remodel Regency Collection (Premium) Decorative trims, upgraded materials More customization options Higher-end pricing tier Brio Collection (Luxury Wood Finish) Real wood construction High-end aesthetics Ideal if you want a luxury feel This is where the cost of closets by design can exceed $7,000+ Closets by Design Cost Breakdown To truly understand how much does closets by design cost, you need to see where your money goes: Materials: $800 – $6,000 Labor & Installation: $1,000 – $5,000 Accessories: $100 – $1,500 From a practical standpoint, materials and customization drive most of the cost not labor. What Factors Affect Closets by Design Cost? This is the most important section when evaluating closet by design prices. Closet Size & Layout Larger closets require more materials and labor Walk-ins cost significantly more than reach-ins Materials & Finishes Laminate = budget-friendly Wood = premium pricing Custom finishes increase cost Features & Accessories Drawers Shoe racks Lighting Jewelry organizers These small upgrades can add hundreds or thousands to the final cost of closets by design Door Styles Sliding doors = affordable Hinged or glass doors = more expensive Location & Labor If you’re considering Closets in Lindenhurst, NY, labor rates and installation complexity may vary slightly depending on the property and layout. At prestigious custom cabinets, we’ve seen how location-specific needs like older home structures can influence the final price. Real-Life Cost Examples To make things clearer, here are realistic scenarios: Small reach-in closet: ~$1,500 Standard bedroom closet: ~$3,500 Luxury walk-in closet: $8,000+ These examples reflect real homeowner spending and give a clearer idea of how much is it to build a closet based on needs. Closets by Design vs Other Brands Brand Average Cost Closets by Design $2,000–$7,000+ IKEA $800–$3,500 California Closets $4,000–$10,000+ IKEA is cheaper but less customizable California Closets is premium-priced Closets by Design sits in the middle Closets by Design vs California Closets Price Difference Closets by Design: More budget flexibility California Closets: Higher starting cost Quality Both offer durable systems California Closets uses more premium materials Best For Closets by Design → budget-conscious homeowners California Closets → luxury-focused buyers Is Closets by Design Worth It? Pros Customizable solutions Wide pricing range Free design consultation Cons Upselling during consultation Prices can increase with add-ons ROI (Return on Investment) A well-designed closet can: Improve home value Increase storage efficiency Enhance daily convenience From experience, closet upgrades offer practical ROI, not just financial. Hidden Costs You Should Know Many homeowners underestimate these: Premium finishes Extra drawers or organizers Installation add-ons These can significantly raise the closet by design prices beyond initial quotes. How to Save Money on Closets by Design Look for seasonal discounts (often 40–60%) Compare multiple quotes Avoid unnecessary upgrades Stick to functional designs Smart planning can reduce the average cost of closet remodel without sacrificing quality. Installation Timeline (Quick Answer) Design consultation: 1–2 hours Manufacturing: 2–4 weeks Installation: 1–3 days  Fast installation is one reason many homeowners choose this option. You may also read: How to Organize Closet Conclusion So, how much does closets by design cost? The honest answer is: it depends on your goals. Whether you’re upgrading a small reach-in or building a luxury walk-in, the final cost reflects your choices in size, materials, and features. If you’re planning a project especially for Closets in Lindenhurst, NY it’s worth getting expert guidance to avoid overspending and design mistakes. At prestigious custom cabinets, we help homeowners create functional, stylish closets tailored to their space and budget. If you’re ready to upgrade your storage, contact us today to get a personalized estimate and expert advice. FAQs How much does closets by design cost for a standard closet? The cost typically ranges from $1,100 to $3,500 for standard closets. Larger or customized designs increase the total price significantly. Are closets by design prices worth it? Yes, for many homeowners, the balance between customization and affordability makes it a good investment compared to high-end competitors. What is the average cost of closet remodel projects? The average cost of closet remodel projects falls between $2,000 and $5,000, depending on size and materials. How

how long does a kitchen remodel take​
kitchen remodel

How Long Does a Kitchen Remodel Take? Full Timeline

Thinking about redoing your kitchen? Smart move. But before you pull out cabinets or call a contractor, you need to know one thing: this takes time. Most homeowners are surprised by how long the process actually runs. A small update might wrap up in a few weeks. A full gut renovation? That can stretch to four months or more. So, how long does a kitchen remodel take? The short answer: 6 to 12 weeks for most mid-range projects. But your timeline depends on your kitchen size, contractor schedule, and how fast decisions get made. Let’s break it all down. How Long Does a Kitchen Remodel Really Take? Here’s a quick reference based on project size: Project Type Estimated Timeline Minor refresh (paint, hardware, lighting) 1–2 weeks Cabinet refacing + new counters 2–4 weeks Mid-range remodel (new cabinets, appliances, flooring) 6–10 weeks Full gut renovation 10–16 weeks High-end custom remodel 4–6 months These are real-world ranges. Not best-case numbers. Delays happen. Materials get backordered. Permits take longer than expected. Plan for the high end of any range. Before Starting Your Kitchen Remodel The work doesn’t start when the demo crew shows up. It starts weeks before that. Most homeowners skip the pre-planning phase. Then they wonder why their project drags on. Here’s what needs to happen before a single wall comes down: Set a clear budget. Know your total number. Then add 15–20% for surprises. Old kitchens hide problems. Mold, bad wiring, rotted subfloor these all cost money and time. Decide what you actually want. Countertop material. Cabinet style. Appliance brand. Layout changes. The more decisions you make early, the fewer delays you hit mid-project. Get multiple contractor quotes. This takes 2–3 weeks on its own. Good contractors are booked out. If someone can start tomorrow, ask why. Order materials early. Custom cabinets can take 6–10 weeks to arrive. Some countertop slabs need to be sourced and cut. Order early. Don’t wait until the demo is done. Pull permits. In most areas, a kitchen remodel requires building permits. This can add 1–3 weeks before work begins. Pre-planning typically takes 4 to 8 weeks on its own. Factor this into your total timeline. What Factors Influence Your Kitchen Remodel Timeline? Not every kitchen takes the same amount of time. Here’s what actually moves the needle: 1. Scope of Work Replacing a faucet is a one-afternoon job. Moving a load-bearing wall is a multi-week project. The more you change, the longer it takes. Simple rule. 2. Kitchen Size A 150 sq ft kitchen installs faster than a 400 sq ft open-concept space. More square footage means more tile, more cabinets, more wiring, and more labor hours. 3. Custom vs. Stock Materials Stock cabinets ship in 1–2 weeks. Semi-custom takes 3–5 weeks. Full custom cabinets can take 8–12 weeks. If you choose custom, plan your entire project around that lead time. 4. Permit and Inspection Requirements Structural changes, electrical upgrades, and plumbing moves all require permits in most U.S. municipalities. Each inspection adds time. Miss an inspection, and work stops until it’s cleared. 5. Contractor Availability A good contractor with a full crew can move fast. One person juggling multiple projects? Expect slower progress. Ask upfront: how many crews will be on-site and how many days per week? 6. Decision Speed This one is underrated. Homeowners who take weeks to pick a tile or countertop edge profile slow everything down. Your contractor can’t order materials until you decide. Make decisions fast. Keep a list of open items and resolve them daily. 7. Hidden Conditions Old homes especially have surprises: knob-and-tube wiring, asbestos tile, out-of-plumb walls. Any hidden condition adds time and cost. Perception vs. Reality: What to Really Expect Here’s what most remodeling guides won’t tell you. Perception: “My contractor said 8 weeks.” Reality: Expect 10–14 weeks when you include delays, inspections, and touch-ups. Perception: “I’ll just live out of one room during the remodel.” Reality: A full kitchen demo means no sink, no stove, and constant dust for weeks. Set up a temporary kitchen. Get a microwave and a mini-fridge. Budget for more takeout than you think. Perception: “Delays only happen to people who didn’t plan.” Reality: Supply chain hiccups, weather delays, and subcontractor scheduling gaps happen to everyone. Even well-planned projects hit bumps. The homeowners who handle remodels best are the ones who planned for reality, not the best-case scenario. How Should You Plan and Design Your Kitchen Remodel? Good design upfront saves weeks on the back end. Here’s how to do it right. Hire a kitchen designer or work with a design-build firm. They catch layout problems before the demo. They know lead times. They coordinate materials. The cost is worth it. Use 3D renderings. Most designers offer this. Seeing your kitchen before it’s built helps you make faster, more confident decisions. Changes on paper cost nothing. Changes mid-construction cost a lot. Create a selection binder. One document. Every material, product, and finish chosen. Vendor. SKU number. Order date. Delivery date. Review it weekly. Build a project schedule. Work backward from your target move-in date. Block out when each trade needs to be on-site. Electrician before drywall. Plumber before tile. Countertop template after lower cabinets are installed. Communicate constantly. Daily check-ins with your contractor reduce surprises. Walk the space every morning. Ask questions. You can read about: How to Build Kitchen Cupboards What Are the Main Phases of a Kitchen Remodel Construction? Understanding how long to remodel a kitchen means understanding each phase. Here’s how it typically flows: Phase 1: Demo (1–3 Days) Old cabinets, countertops, flooring, and sometimes walls come out. Fast and messy. Often reveals surprises. Phase 2: Rough-In Work (1–2 Weeks) Electrical, plumbing, and HVAC get moved or upgraded. This phase depends on how much you’re changing. Moving the sink across the room? That’s more time. Keeping plumbing in place? Faster. Phase 3: Inspections (2–5 Days, Sometimes Longer) After rough-in, inspectors come in to sign off on electrical and plumbing. Schedule this as early as possible. Some

10x10 kitchen remodel cost
kitchen remodel

How Much Should a 10×10 Kitchen Remodel Cost in 2026?

Most homeowners underestimate their kitchen remodel cost by 20–30%. What starts as a simple upgrade of new cabinets, lighting, or countertops often turns into a larger investment. If you’re researching the 10×10 kitchen remodel cost, you’re likely looking for realistic expectations before starting.  At prestigious custom cabinets, we’ve seen how costs vary based on design choices, materials, and local labor rates. The average cost of small kitchen remodel projects has increased, especially in Long Island. That’s why understanding how much for a small kitchen renovation truly costs helps you plan better and avoid unexpected expenses. Quick Cost Snapshot (2026 Estimates) Here’s a realistic look at the 10×10 kitchen remodel cost based on current market trends, based on real project insights from prestigious custom cabinets: Budget Remodel: $15,000 – $25,000 Mid-Range Remodel: $25,000 – $45,000 High-End Remodel: $45,000 – $75,000+ These numbers reflect real-world kitchen remodel costs, not just theoretical averages. Your final price depends on materials, labor, and how much you change the layout. What Is a 10×10 Kitchen? A 10×10 kitchen refers to a standard kitchen layout measuring 10 feet by 10 feet (100 square feet). Contractors often use this size as a baseline to estimate pricing because it represents a typical small kitchen. Even though it’s considered compact, a 10×10 kitchen can still include: Cabinets on multiple walls Standard appliances Countertops and backsplash This size is commonly used when calculating the small kitchen remodel cost or comparing design options. Full Cost Breakdown (Where Your Money Goes) Here’s how most kitchen remodel costs are distributed in a 10×10 kitchen: Component Cost Range % of Budget Cabinets $6,000–$20,000 40–50% Countertops $2,000–$5,000 10–15% Appliances $2,000–$8,000 10–20% Flooring $1,500–$4,000 5–10% Labor $5,000–$15,000 20–30% Miscellaneous $1,000–$3,000 5–10% Cabinets take the largest portion, which is why choosing the right type matters most. Real Cost by Category (Detailed Insights) Cabinets (Biggest Investment) Cabinets define both the look and functionality of your kitchen. Stock Cabinets: $6,000–$10,000 Semi-Custom: $10,000–$18,000 Custom Cabinets: $15,000–$30,000+ Custom cabinets cost more because they’re built to fit your exact space. This is where companies like prestigious custom cabinets add value offering tailored solutions that maximize storage and design. Countertops Laminate: $2,000–$3,000 Quartz/Granite: $3,000–$5,000 Marble: $5,000+ Countertops impact both aesthetics and durability, making them a key part of how much does a small kitchen cost overall. Appliances Appliances vary widely depending on brand and features: Basic set: $2,000–$4,000 Mid-range: $4,000–$6,000 Premium: $6,000–$10,000+ Flooring Vinyl/Laminate: $1,500–$2,500 Tile: $2,500–$4,000 Flooring choices affect both budget and maintenance. Labor & Installation Labor often surprises homeowners: Installation Plumbing Electrical work In high-cost areas, labor significantly increases the average cost of small kitchen remodel projects. Real-Life Cost Examples Budget Kitchen (~$18,000) A homeowner keeps the layout the same, installs stock cabinets, and chooses laminate countertops. This is the most affordable way to manage small kitchen remodel cost. Mid-Range Kitchen (~$35,000) Semi-custom cabinets, quartz countertops, and upgraded appliances. This is the most common range for homeowners asking how much for a small kitchen renovation. Luxury Kitchen (~$65,000) Custom cabinetry, premium materials, and layout changes. This reflects high-end kitchen remodel costs with maximum customization. Major Cost Factors That Impact Your Budget Several factors influence your total cost: Location: Labor in Long Island is higher than the national average Materials: Premium finishes increase costs quickly Layout Changes: Moving plumbing or walls adds thousands Structural Work: Hidden issues can raise expenses If you’re planning a project like Kitchen Remodel Lindenhurst, NY, expect slightly higher costs due to local demand and labor rates. Budget Scenarios (What You Can Expect) Under $20,000 Basic upgrades Stock cabinets Limited customization Around $30,000 Semi-custom cabinets Better materials Balanced design and cost $50,000+ Custom cabinets High-end finishes Full transformation This range reflects what many homeowners spend when asking how much does a small kitchen cost for a premium result. How to Save Money Without Sacrificing Quality Smart decisions can reduce your small kitchen remodel cost: Keep the existing layout Mix stock and custom cabinets Choose durable but affordable materials Plan everything before starting Avoid cutting corners on cabinets; they impact both function and resale value. Timeline: How Long Does It Take? Basic Remodel: 3–6 weeks Mid-Range: 6–10 weeks Custom Remodel: 10+ weeks Timelines depend on material availability and project complexity. You may also read: How to Organize Closet Final Thoughts Understanding the 10×10 kitchen remodel cost helps you plan smarter and avoid budget surprises. Whether you’re going for a simple update or a luxury transformation, knowing where your money goes makes all the difference. If you’re considering a remodel and want expert guidance, prestigious custom cabinets can help you design a kitchen that fits your space, style, and budget. Contact us today to get a free custom cabinet quote and see what your 10×10 kitchen could truly cost. FAQs Can I remodel a 10×10 kitchen for under $10,000? It’s possible, but only with minimal updates like painting cabinets and replacing hardware. Full remodels typically exceed this budget due to labor and material costs. What is the most expensive part of a kitchen remodel? Cabinets are usually the most expensive, making up nearly half of total kitchen remodel costs. Custom cabinetry increases this further. How long does a small kitchen remodel take? Most projects take 3–10 weeks depending on scope. Custom designs and structural changes extend the timeline. Are custom cabinets worth it? Yes, especially in small kitchens where space matters. They improve storage, functionality, and long-term value. How can I avoid unexpected costs? Plan thoroughly, set a realistic budget, and include a contingency fund. This helps manage the true average cost of small kitchen remodel projects.

how to organize closet
Closets

How to Organize Closet (Step-by-Step Guide)

A messy closet can quietly add stress to your daily routine. When clothes pile up and items are hard to find, getting dressed becomes frustrating. Learning how to organize closet can make daily life easier by saving time and reducing decision fatigue. An organized space helps you see and use the clothes you already own.  Many homeowners realize closet organization isn’t just about cleaning it’s about creating a practical system. Brands like prestigious custom cabinets highlight how smart storage and thoughtful design give every item a place. If you’re wondering how to organize your closet, this guide shares simple, practical steps to help you arrange your closet efficiently. Step 1: Empty and Edit Your Closet Before you can truly learn how to organize my closet, you need to start with a clean slate. Take everything out of the closet clothes, shoes, accessories, and storage boxes. Seeing everything at once helps you understand how much you actually own and what space you really need. Decluttering Rule: Keep, Donate, Discard Sort items into three simple categories: Keep: Clothes you wear regularly and genuinely like Donate: Items in good condition but rarely used Discard: Damaged or worn-out clothing The 12-Month Rule If you haven’t worn something in the last year, it’s usually a sign that it doesn’t belong in your daily wardrobe. This rule is one of the simplest ways to decide how do you organize a closet without overthinking every item. Decluttering first makes the rest of the organization process much easier. Homeowners who invest in professionally designed storage, such as systems offered by prestigious custom cabinets, often find that vertical organization dramatically increases usable space. Step 2: Categorize Everything Once you’ve decided what stays, the next step in how to organize your closet is grouping items logically. Organizing by category helps you find things faster and keeps the closet visually structured. Shirts Hang or fold shirts together so they’re easy to access. This includes: T-shirts Dress shirts Blouses Pants Keep jeans, trousers, and leggings together. Folding them uniformly or hanging them on clip hangers helps maintain order. Dresses Dresses usually hang best to avoid wrinkles and save folding space. Accessories Accessories can easily create clutter, so keep them grouped: Belts Scarves Hats Seasonal Clothes Store items you don’t need right now in a separate section. This makes everyday clothing easier to access and improves the overall closet flow. Step 3: Create an Organization System Now that everything is sorted, you need a consistent structure for maintaining order. This is where many people finally understand the best way to organize clothes. Use Matching Hangers Uniform hangers create visual consistency and help clothes hang evenly. Benefits include: Saving horizontal space Preventing clothes from slipping Creating a clean, organized appearance Organize Clothes by Category Within each category, place similar items together. For example: Work shirts Casual shirts Workout clothing This structure simplifies the process of how to arrange closet layouts for everyday use. Arrange Clothes by Color Color coordination isn’t just aesthetic, it’s practical. It helps you quickly spot items and makes the closet easier to maintain over time. Step 4: Maximize Closet Space Closets often have unused vertical space. Using that space wisely is essential when learning how to organize closet efficiently. Vertical Storage Vertical storage solutions make use of height rather than floor space. Examples include: Tall shelves Hanging fabric organizers Stackable storage bins Shelf Dividers Shelf dividers prevent piles of clothes from collapsing and keep stacks neatly separated. Hanging Organizers These are particularly useful for: Sweaters Folded shirts Small accessories Step 5: Use Storage Boxes and Baskets Storage containers help manage smaller items that can easily create clutter. Socks and Underwear Organizers Drawer organizers keep smaller clothing items visible and separated. Belt and Scarf Storage Belts and scarves can be stored in: Small baskets Drawer dividers Dedicated hooks Drawer Dividers Drawer dividers create compartments so items stay in place instead of mixing together. These simple tools make it easier to maintain the best way to organize clothes long-term. Step 6: Organize Shoes and Accessories Shoes and accessories are often the hardest items to manage when figuring out how do you organize a closet effectively. Shoe Racks A shoe rack prevents piles on the floor and keeps pairs together. Over-Door Organizers These organizers are excellent for small closets because they use unused door space. They work well for: Shoes Small accessories Seasonal items Accessory Trays Trays or small organizers are useful for jewelry, watches, and other small items that need protection. Step 7: Store Seasonal Clothes Separately Seasonal rotation is a practical solution when learning how to organize my closet without overcrowding it. Winter vs Summer Rotation Store off-season clothing elsewhere so your everyday closet stays uncluttered. Examples include: Heavy winter coats during summer Lightweight summer clothing during winter Vacuum Storage Bags Vacuum bags compress bulky clothing like jackets or blankets, saving valuable storage space. Step 8: Label Everything Labels may seem like a small detail, but they significantly improve long-term organization. Storage Labels Label boxes or bins so you know exactly what’s inside without opening them. Clear Containers Transparent containers allow you to see items instantly, making the closet easier to navigate. For homeowners upgrading their storage, custom closet solutions like Closets Services in Lindenhurst, NY can also include built-in labeling and organization systems that simplify everyday use. Step 9: Closet Organization Hacks Small habits and clever techniques can make a big difference in maintaining an organized space. Reverse Hanger Trick Turn all hangers backward. When you wear an item, return it normally. After several months, any hanger still reversed shows clothing you haven’t used. Capsule Wardrobe Method A capsule wardrobe focuses on fewer, versatile clothing pieces that mix and match easily. This approach simplifies decisions and makes it easier to maintain how to arrange closet systems efficiently. Use Door Space The inside of closet doors is often wasted space. Hooks or hanging organizers can store: Bags Scarves Belts Step 10: Maintain Your Closet Weekly The final step in how

how much does it cost to paint kitchen cabinets in 2026
Kitchen Cabinet Painting, Kitchen Cabinets

How Much Does It Cost to Paint Kitchen Cabinets in 2026? (Complete Cost Guide)

A kitchen remodel can cost tens of thousands of dollars, but painting your cabinets is one of the most affordable ways to refresh your space. If you’re wondering how much does it cost to paint kitchen cabinets in 2026, many homeowners are asking the same question as they look for budget-friendly upgrades. Instead of replacing cabinets, painting offers a faster and more cost-effective way to achieve a modern look.  At prestigious custom cabinets, we’ve seen how professionally painted cabinets can completely transform a kitchen. Whether you want to update old wood cabinets or create stylish painted white kitchen cupboards, understanding the real costs helps you plan confidently. Average Cabinet Painting Cost in 2026 Homeowners often ask: how much does it cost to have kitchen cabinets painted today compared to previous years? Prices have slightly increased due to labor and material costs, but cabinet painting still remains far cheaper than full replacement. National Average Cost In 2026, the average cost to paint kitchen cabinets professionally typically falls between: $3,000 – $7,500 for most kitchens $75 – $150 per cabinet $30 – $60 per linear foot For smaller kitchens, the total project may cost around $2,000, while larger kitchens with premium finishes can exceed $10,000. When homeowners ask how much does it cost to get kitchen cabinets painted, the answer depends largely on the kitchen size, cabinet condition, and the finish they choose. Cost Per Cabinet Another way contractors estimate cost is per cabinet door or box. Typical cabinet painting costs in 2026: Small cabinet: $60 – $90 Standard cabinet: $80 – $120 Large cabinet: $100 – $150 For example: A kitchen with 20 cabinets might cost around $1,800 – $3,500. A kitchen with 30 cabinets may cost $3,000 – $5,500. This pricing model helps homeowners understand how much does it cost to paint kitchen cabinets professionally when comparing quotes. Cost Per Linear Foot Contractors sometimes price cabinet painting based on linear feet of cabinetry. Average pricing in 2026: $30 – $60 per linear foot Example estimates: Kitchen Size Linear Feet Estimated Cost Small Kitchen 10–15 ft $1,500 – $3,000 Medium Kitchen 15–25 ft $3,000 – $6,000 Large Kitchen 25–40 ft $6,000 – $10,000 This approach is helpful for quickly estimating how much does it cost to have kitchen cabinets painted before scheduling an in-home quote. Cost by Kitchen Size Kitchen size has one of the biggest impacts on total cost. Small Kitchens (10–15 cabinets) Average cost: $1,500 – $3,000 Medium Kitchens (20–30 cabinets) Average cost: $3,000 – $6,500 Large Kitchens (30+ cabinets) Average cost: $6,000 – $10,000+ If you want to explore local services, homeowners often search for Kitchen Cabinet Painting Lindenhurst, NY when comparing pricing and experienced contractors in their area. Factors That Affect Cabinet Painting Cost Understanding what drives pricing helps answer the common question: how much does it cost to paint kitchen cabinets in 2026 for your specific project. Kitchen Size and Number of Cabinets More cabinets require: Additional prep work More primer and paint Longer labor time Even a difference of 5–10 cabinets can add $500 – $1,500 to the total cost. Condition of Existing Cabinets Cabinet condition plays a major role in determining how much does it cost to get kitchen cabinets painted. Extra prep work may include: Degreasing surfaces Sanding heavy finishes Filling dents or scratches Repairing loose hinges Poor cabinet conditions may increase project cost by 10–25%. Cabinet Material Not all cabinet materials paint the same. Common cabinet materials include: Solid wood (best for painting) MDF Laminate Thermofoil Solid wood cabinets usually produce the most durable painted finish, especially for popular styles like painted white kitchen cupboards. Paint Type and Finish Higher-quality paints cost more but last significantly longer. Popular cabinet paint finishes include: Satin Semi-gloss Matte High-gloss Professional-grade enamel paints cost more but resist: Grease Moisture Scratches This is one reason homeowners often ask how much does it cost to paint kitchen cabinets professionally instead of doing it themselves. Labor Cost and Location Labor accounts for 60–70% of cabinet painting costs. Location also affects pricing. For example: Urban areas may charge higher rates Specialized cabinet painters charge premium prices Experienced companies often deliver longer-lasting results Companies like prestigious custom cabinets focus on detailed preparation and professional finishes, which significantly improve durability. Painting Method Cabinets can be painted using different methods: Brush and roller Lower cost Slight texture Spray finish Smooth factory-like finish Higher labor cost Spray finishes are typically used for high-end projects and for achieving smooth painted white kitchen cupboards. Cabinet Painting vs Cabinet Replacement Cost Cabinet replacement is far more expensive than painting. Project Average Cost Cabinet Painting $3,000 – $7,500 Cabinet Refacing $8,000 – $15,000 Cabinet Replacement $20,000 – $35,000+ If your cabinets are structurally sound, painting them can save up to 70–80% compared to replacement. That’s why many homeowners exploring how much does it cost to have kitchen cabinets painted end up choosing painting as the smarter investment. DIY vs Professional Cabinet Painting Cost Many homeowners consider painting cabinets themselves to save money. DIY Cabinet Painting Typical DIY costs include: Paint: $100 – $300 Primer: $40 – $80 Sandpaper & tools: $50 – $150 Total DIY cost: $200 – $600 However, DIY cabinet painting requires time, patience, and proper tools. Mistakes often lead to uneven finishes or peeling paint. Professional Cabinet Painting Professional services typically cost: $3,000 – $7,500 But professionals provide: Proper sanding and prep Spray finishes Durable coatings Faster project completion That’s why many homeowners researching how much does it cost to paint kitchen cabinets professionally choose experienced contractors instead. Best Paints and Primers for Kitchen Cabinets Choosing the right paint system dramatically impacts durability. Why Primer Is Important Primer helps paint adhere properly and prevents stains from bleeding through. Benefits include: Stronger adhesion Smoother finish Better durability Improved color coverage Skipping primer is one of the biggest DIY cabinet painting mistakes. Best Cabinet Paint Types Professional painters typically use: Acrylic enamel paint Waterborne alkyd paint Oil-based enamel These paints create a durable finish resistant to

how to clean greasy kitchen cupboards​
Kitchen cupboard

How to Clean Greasy Kitchen Cupboards?

Grease buildup on kitchen cupboards is a common issue in busy kitchens. When you cook regularly, oil particles, steam, and food residue settle on cabinet surfaces. Over time, this layer becomes sticky and dull, making cupboards harder to clean and maintain. Many homeowners search for how to clean greasy kitchen cupboards safely without damaging the cabinet finish.  At Prestigious Custom Cabinets, we often see cabinets lose their original shine simply because grease has accumulated over the years. The good news is that with the right cleaning methods and gentle ingredients, you can remove grease effectively and keep your kitchen cupboards looking fresh and well-maintained. Why Kitchen Cupboards Get Greasy Before learning the cleaning process, it helps to understand why grease builds up in the first place. Cooking Oil and Airborne Grease Every time you cook, tiny oil particles travel through the air. These particles settle on nearby surfaces, especially cabinet doors above or beside the stove. Over time, they combine with dust and form a sticky film. Cabinets Near the Stove Collect More Grease Kitchen cabinets closest to the cooktop usually accumulate grease faster. The combination of heat, steam, and cooking oil makes these surfaces the most affected areas. Poor Ventilation in the Kitchen Without proper airflow or a working exhaust fan, grease particles remain in the air longer and settle on cabinets and countertops. At Prestigious Custom Cabinets, we often recommend good ventilation and regular maintenance to reduce heavy grease buildup and protect cabinet finishes. Things You Need to Clean Greasy Kitchen Cupboards You don’t need expensive cleaning products to remove grease from cabinets. Most effective solutions can be made with simple household items. Here are the basic supplies for cleaning wood cabinets safely: Dish soap (a gentle grease-cutting cleaner) Warm water Baking soda White vinegar Microfiber cloth or soft sponge Old toothbrush for tight corners Spray bottle (optional) Dry towel These simple tools help with kitchen cabinet grease removal while protecting the cabinet finish. How to Clean Greasy Kitchen Cupboards (Step-by-Step) If you’re wondering how to clean grease off kitchen cabinets properly, follow this simple step-by-step method used by professionals. Step 1: Remove Dust and Loose Debris Before applying any cleaning solution, wipe cabinets with a dry microfiber cloth. This removes dust and prevents scratching when you start cleaning wood cabinets. Step 2: Prepare a Mild Cleaning Solution Mix a few drops of dish soap with warm water. Dish soap is designed to break down oils, making it ideal for how to remove grease from kitchen cabinets. Dip a cloth into the mixture and wring it out so it’s damp, not dripping. Step 3: Gently Wipe the Cabinet Surface Start wiping cabinet doors, handles, and edges. Always clean in the direction of the wood grain when cleaning wood cabinets to avoid damage. For light grease buildup, this step may be enough to restore the surface. Step 4: Use Baking Soda for Stubborn Grease If grease stains remain, make a paste using baking soda and water. Apply it gently using a soft cloth or toothbrush. Baking soda works well for kitchen cabinet grease removal without scratching most finishes. Step 5: Use Vinegar for Final Cleaning White vinegar helps dissolve leftover grease and removes residue. Mix equal parts vinegar and warm water in a spray bottle and lightly wipe the surface. This step is very helpful when learning how to clean wooden kitchen units safely. Step 6: Dry the Cabinets Properly Always finish by wiping cabinets with a dry cloth. Excess moisture can damage wood over time, especially when cleaning wood cabinets. Best Natural Methods to Remove Grease Many homeowners prefer natural solutions for how to clean grease off kitchen cabinets because they are safe and easy to use. Baking Soda and Water Paste This method works well for thick grease layers. Steps: Mix baking soda with water to create a paste Apply it to greasy spots Gently scrub using a soft cloth Wipe clean with warm water Baking soda helps break down oils and supports effective kitchen cabinet grease removal. Vinegar and Warm Water Spray Vinegar naturally cuts through grease. How to use it: Mix equal parts vinegar and warm water Spray lightly on cabinet surfaces Wipe with a microfiber cloth This solution works well for how to clean wooden kitchen units while keeping finishes intact. Lemon and Dish Soap Mixture Lemon adds natural acidity that helps break down oils. Steps: Mix dish soap with warm water Add a few drops of lemon juice Wipe cabinet surfaces gently This technique is often recommended for how to remove grease from kitchen cabinets while leaving a fresh scent. How to Clean Sticky Grease from Wooden Kitchen Cabinets Wood cabinets require extra care. Harsh chemicals and abrasive scrubbing can damage finishes or remove protective coatings. When learning how to clean wood kitchen cabinets, keep these tips in mind: Use soft cloths instead of rough scrubbers Avoid soaking wood with water Always wipe in the direction of the grain Dry cabinets immediately after cleaning Sticky grease usually forms when oil buildup mixes with dust. A mild soap solution followed by a vinegar wipe often works best for cleaning wood cabinets. Homeowners looking for professional guidance or cabinet upgrades can also explore Kitchen Cupboards Lindenhurst, NY services offered by experts who specialize in cabinet maintenance and custom solutions. How to Prevent Grease Build-Up on Kitchen Cupboards Cleaning grease repeatedly can become time-consuming. Preventing buildup is much easier. Here are practical habits that reduce grease accumulation. Clean Cabinets Weekly A quick wipe with warm water and mild soap once a week prevents thick grease layers. Wipe Cabinets After Cooking After cooking oily foods, wipe nearby cabinets lightly. This simple step reduces long-term kitchen cabinet grease removal needs. Use an Exhaust Fan Ventilation plays a big role in preventing grease buildup. A good exhaust fan pulls oil particles away from cabinets. Install Cabinet Liners Cabinet liners help protect interior shelves from grease and food residue. Proper care not only keeps cabinets clean but also extends

how to build kitchen cupboards
Kitchen cupboard

How to Build Kitchen Cupboards: A Complete DIY Guide

New kitchen cabinets can cost thousands. But with basic tools and a free weekend, you can build solid, good-looking cupboards yourself. It takes some planning, a bit of patience, and the right steps. The result? Custom storage that fits your exact kitchen and your budget. This guide walks you through how to build kitchen cupboards from scratch. Whether you are trying DIY kitchen cupboards for the first time or you have some woodworking experience, these steps will help you get it right. Why Build Your Own Kitchen Cupboards? Store-bought cabinets look nice, but they rarely fit perfectly. Your kitchen has its own layout, corners, and dimensions. Building your own gives you full control over size, style, and finish. Here is why many homeowners go the DIY route: Cost savings of 40 to 60 percent compared to buying pre-made cabinets Custom sizes that fit awkward walls, low ceilings, or corner spaces Full choice of wood type, door style, and finish Higher quality build when you use solid materials A project you can be proud of for years If you enjoy working with your hands, making kitchen cupboards is a rewarding and practical project. Tools and Materials You Will Need Before you start cutting wood, get everything ready. Missing a tool halfway through is frustrating and slows you down. Tools Circular saw or table saw Drill and drill bits Pocket hole jig (Kreg jig is popular) Tape measure and pencil Clamps Level and square Sander (orbital or belt) Nail gun or finish nailer Router (optional, for edge detail) Materials 3/4 inch plywood (cabinet-grade birch or maple is best) 1/4 inch plywood for the cabinet back panel 1×3 or 1×4 hardwood boards for the face frame Wood glue and pocket screws Hinges and cabinet pulls Shelf pins and adjustable shelves Paint, stain, or finish of your choice Pro tip: Buy a little extra material. Mistakes happen, and you do not want to make a store run in the middle of your build. Plan and Measure Your Kitchen Good kitchen cupboard plans start with precise measurements. This step is the most important one. A measurement that is off by even a quarter inch can cause big problems later. Here is how to do it right: Measure every wall where cabinets will go. Write it all down. Note the location of windows, doors, and outlets. Mark where your studs are in the wall (you will need them for mounting). Decide on your cabinet height. Standard base cabinets are 34.5 inches tall. Wall cabinets are usually 30 to 42 inches tall. Sketch a simple layout on paper or use free software like SketchUp. Standard kitchen cabinet depth is 24 inches for base cabinets and 12 inches for uppers. You can adjust these to fit your space. This is one advantage of building your own over buying pre-made. Once your plan is done, create a cut list. This is a list of every panel you need with its exact dimensions. A good cut list saves time and reduces waste. Cut the Cabinet Panels With your cut list ready, it is time to cut your plywood. Work on a flat surface. Measure twice, cut once. Each cabinet box needs these panels: Two side panels One top panel One bottom panel One back panel (1/4 inch plywood) Shelf panels if needed Use a guide rail or fence on your saw for straight cuts. Plywood can splinter on the cut edge. To avoid this, put masking tape along your cut line before sawing. It gives a cleaner edge. Label each panel with a pencil as you cut. This keeps things organized when you get to assembly. One mistake beginners make is mixing up similar-sized pieces. Assemble the Cabinet Box This is where the project starts to take shape. Cabinet box assembly uses a method called pocket hole joinery. It is strong, fast, and beginner-friendly. Follow these steps: Drill pocket holes into the top and bottom panels using your pocket hole jig. Apply a thin line of wood glue to the joint area. Clamp the top panel between the two side panels. Make sure it is square. Drive pocket screws through the holes to lock the joint. Repeat for the bottom panel. Check the box with a square. It must be perfectly square or the doors will not  hang right. Nail or staple the 1/4 inch back panel on. This makes the box rigid. Let the glue dry for at least an hour before moving the box. This gives you a solid, strong cabinet shell. Build and Attach the Face Frame A face frame is the border of wood that goes on the front of the cabinet box. It gives the cabinet a finished look and a place to attach hinges. To build the face frame: Cut your 1×3 hardwood into stiles (vertical pieces) and rails (horizontal pieces). The stiles run the full height of the cabinet. Rails go between them at top and bottom. Use pocket holes to join the rails to the stiles. Glue and clamp the assembled frame to the front of the cabinet box. Nail through the frame into the cabinet box for a stronger hold. The face frame should be flush with the inside of the cabinet box. If it overhangs even slightly, it can affect how the door sits. Take your time here. Install Shelves Adjustable shelves are more useful than fixed ones. They let you store tall bottles, small jars, or whatever you need. To install adjustable shelves: Drill rows of 5mm holes on the inside of each side panel. Use a shelf pin jig for even spacing. Space the holes about 1 inch apart for maximum flexibility. Cut your shelf panels to fit with a small gap on each side (about 1/8 inch). Insert shelf pins and drop the shelf in. That is it. For shelves that will hold heavy items like cast iron pans, use solid 3/4 inch plywood. Thin shelves will sag over time under heavy loads. Add Cabinet Doors