
Sliding closet doors are one of those home upgrades that look complicated but are actually very manageable with the right guide. They save floor space, give any room a cleaner look, and hold up well for years when installed correctly. Most homeowners with basic DIY skills can get this done in a few hours.
Learning how to install sliding closet doors doesn’t require a contractor. You need the right tools, the right measurements, and a clear process to follow. This guide walks you through every step from picking the right door to making final adjustments so it glides perfectly.
What Are Sliding Closet Doors?
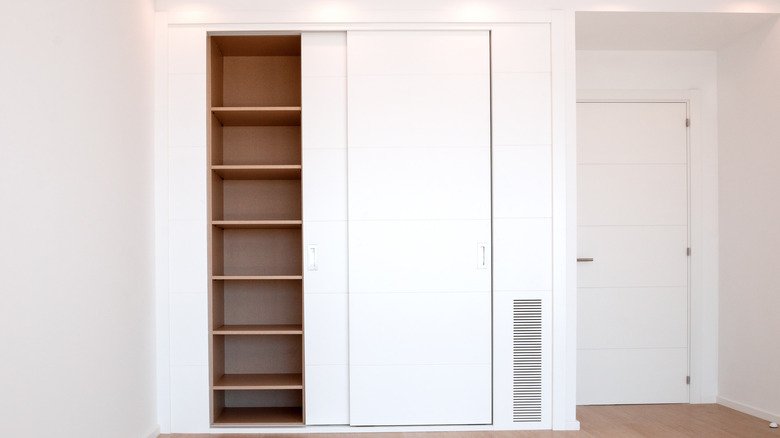
Sliding closet doors are panels that move horizontally along a track rather than swinging open on hinges. They mount on an overhead track at the top and a guide channel or roller at the floor.
They come in several styles:
Bypass doors — Two or more panels that slide past each other on separate tracks. The most common style for standard closets. You can access one side at a time.
Barn doors — A single large panel that slides to one side. Mounted on an exposed track above the opening. Popular in modern and farmhouse-style rooms.
Pocket doors — Slide into the wall itself. Require wall modification but completely disappear when open.
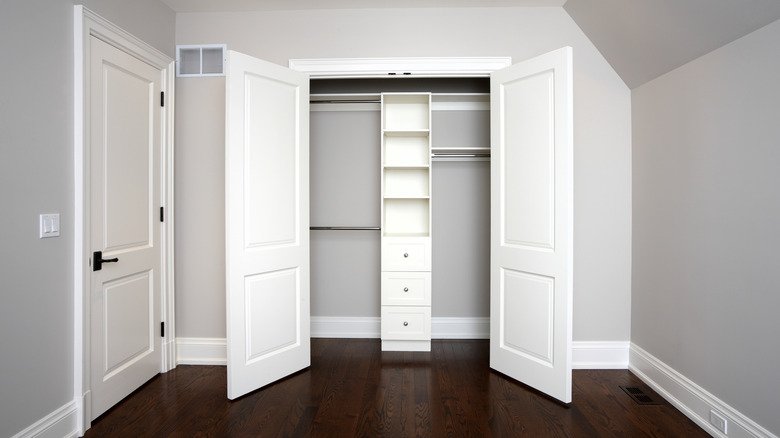
Bifold sliding doors — Panels that fold while sliding. Common in laundry closets and smaller spaces.
For most bedroom closets, bypass doors are the practical choice. They work with almost any opening size and require no wall modifications.
Why Choose Sliding Closet Doors?
There are real reasons sliding doors have stayed popular for decades.
Space savings. Swing-out doors need clearance in front of the closet. Sliding doors need none. In smaller bedrooms, this matters a lot.
Clean visual lines. Sliding doors sit flush with the wall or opening. They don’t interrupt the room’s flow the way hinged doors can.
Easy access for wide openings. A standard 6-foot closet opening is awkward with hinged doors. Sliding panels handle wide openings naturally.
Low maintenance. With a quality track system, sliding doors need almost no attention beyond occasional cleaning.
Cost-effective upgrade. Compared to built-in wardrobe systems or custom cabinetry, sliding closet doors offer a major visual upgrade at a relatively low cost.
Tools and Materials You’ll Need
Before starting sliding closet doors installation, gather everything in one place. Stopping mid-project to find a tool wastes time and breaks focus.
Tools:
- Tape measure
- Pencil or marking tool
- Level (4-foot level is ideal)
- Drill and drill bits
- Screwdriver (flathead and Phillips)
- Hacksaw or miter saw (to cut track if needed)
- Stud finder
- Safety glasses
Materials:
- Sliding door panels (pre-hung kit or individual panels)
- Top track (usually included in kit)
- Bottom guide channel or floor rollers
- Mounting screws (usually included)
- Shims (for leveling, if needed)
- Wood filler or trim pieces (for finishing gaps)
- Door pulls or handles
Most home improvement stores sell complete sliding door kits that include the track, rollers, guides, and hardware. Buying a kit makes the process much simpler than sourcing individual parts.
Step-by-Step: How to Install Sliding Closet Doors
This is where most articles fall short; they skip the details that actually matter. Here’s every step, explained clearly.
Step 1: Measure the Opening Accurately
Measure the width and height of the closet opening at three points each. Width: measure at the top, middle, and bottom. Height: measure at the left, center, and right. Use the smallest measurement for each. Closet openings are rarely perfectly square.
Standard bypass doors come in widths from 48 to 96 inches. If your opening doesn’t match a standard size, you may need to trim the doors or add casing.
Write down: opening width, opening height, and door panel thickness. You’ll need all three when ordering or buying.
Step 2: Choose and Prepare Your Doors
For installing sliding closet doors, door material matters. Common options:
- Mirrored panels — Add light and the illusion of space. Heavier; need a sturdy track.
- Wood or MDF panels — Classic look. Paintable. Lightweight.
- Frosted glass — Modern feel. Requires careful handling.
- Louvered panels — Allow airflow. Good for bedrooms and linen closets.
If your doors arrived pre-assembled, check them for damage before installation. If they came flat-packed, assemble them per the manufacturer’s instructions before moving to the next step.
Step 3: Install the Top Track
The top track carries almost all the door’s weight. Getting this right is critical.
Find the studs above the opening using a stud finder. Mark them with a pencil. If the track spans between studs, use appropriate wall anchors at non-stud positions.
Cut the track to match the opening width, if needed. Use a hacksaw for aluminum tracks. Deburr the cut edge with a file so it doesn’t catch on rollers.
Hold the track in position against the header (the horizontal board at the top of the opening). Use a level to confirm it’s straight. Mark the screw hole positions on the wall or header.
Drill pilot holes at the marked positions. Drive screws through the track into the studs. Don’t overexert yourself. Check level one more time after screwing in.
Step 4: Attach Rollers to the Door Panels
Most sliding closet doors installation kits include top-mounted roller brackets. These clip or screw onto the top edge of each door panel.
Check the manufacturer’s instructions for exact placement. Rollers are usually positioned a few inches from each end of the door. Some kits use adjustable rollers that let you raise or lower the door after hanging; these are worth the slight extra cost.
Attach the rollers firmly. Loose rollers cause wobbling and jumping off the track.
Step 5: Hang the Doors on the Track
This step is easier with two people. One person holds the door; the other guides the rollers onto the track.
Tilt the door panel at an angle. Lift the top rollers into the track channel. Once seated, lower the door to vertical. The rollers should roll freely. Repeat for the second (and third, if applicable) panel.
Slide each door back and forth. They should move smoothly without grinding or wobbling. If a door drags, the track may need slight repositioning, or the roller height needs adjusting.
Step 6: Install the Bottom Guide
The bottom guide keeps the doors from swinging outward at the base. It’s a small but critical component.
Most bottom guides sit centered in the opening, on the floor. Some are a full-length channel; others are small individual guides that sit between the door panels.
For a full floor channel: Center it in the opening. Mark screw positions. Drill pilot holes and screw it down.
For a center guide pin: Position it centered and mark the spot. Some guides use adhesive; others require screwing into the floor. Follow the kit instructions.
Slide the doors into the guide and test movement. The base of each panel should stay in the channel without binding.
Step 7: Adjust for Plumb and Level
Even a careful installation usually needs fine-tuning. Stand back and look at the doors. Are they plumb (perfectly vertical)? Do they hang evenly at the top and bottom?
Most roller brackets include a height adjustment screw or nut. Use a screwdriver or wrench to raise or lower each corner of the door until it hangs straight. Check plumb with a level on the door face.
Adjust until the door gap at the top and sides is consistent and the panels align with each other when closed.
Step 8: Install Door Pulls and Finishing Hardware
Installing a sliding closet door isn’t complete without handles. Most sliding doors use recessed pull small finger-grip cutouts that sit flush in the door edge so panels can pass each other without interference.
Mark the handle position at a comfortable grip height (usually 36 to 40 inches from the floor). Use a drill to create a recess hole. Press the pull into place. Most snap in or secure with small screws from behind.
If your doors have decorative pulls that protrude, make sure they don’t block the other panel from sliding past.
Step 9: Add Trim and Finishing Touches
Check the edges of the opening. If there are gaps between the track and the ceiling, or between the door frame and the wall, add trim molding or casing to cover them.
Fill any visible screw holes with wood filler. Let it dry, sand smooth, and touch up with paint if needed.
Step back. The install is done.
You can read about: How to Build a Closet
Types of Sliding Door Track Systems
Not all tracks are created equal. Knowing the difference helps you pick the right system for your doors.
Surface-mounted track — Sits on the face of the header. Most common in DIY kits. Easy to install and adjust.
Recessed track — Sits inside a routed groove in the header. Cleaner look but requires more precise cutting.
Single-track system — One track, doors overlap. Simpler but limits how far each door can open.
Double-track system — Two tracks side by side. Each door uses its own track. Allows fuller access to the closet.
Soft-close track systems — Include dampeners that slow the door as it reaches the end of travel. Prevents slamming. Worth considering for kids’ rooms or high-use closets.
For most residential closet sliding doors installation, a standard double-track surface-mounted system works perfectly and is the easiest to install.
Common Mistakes to Avoid
These errors show up again and again and all of them are preventable.
Skipping the level check on the top track. An unlevel track causes the doors to drift open or closed on their own. Always level the track before driving screws.
Not finding studs. Screwing into drywall alone won’t hold the weight of full-height mirrors or glass doors. Always hit at least two studs.
Wrong door size. Measure three times, order once. Doors that are even a quarter inch too wide won’t fit. Too narrow leaves visible gaps.
Forgetting the bottom guide. Doors without a bottom guide swing outward and pop off the track. It seems minor until a door falls on someone.
Overtightening roller screws. Stripped screws can’t be adjusted later. Snug not cranked.
Skipping the test roll before finishing. Always slide the doors multiple times before adding trim and finishing. It’s much harder to adjust after everything is closed up.
Maintenance Tips for Sliding Closet Doors
A well-installed door should last years without problems. Keep it that way with these habits:
Clean the track regularly. Dust, hair, and debris collect in the track channel and cause grinding. Wipe it out every few months with a dry cloth or vacuum with a narrow attachment.
Lubricate the rollers annually. Use a dry silicone spray or a roller-specific lubricant. Avoid WD-40 — it attracts dirt. A light spray on the rollers and track keeps movement smooth.
Check roller adjustment screws once a year. Doors can sag slightly over time as rollers wear. A quick adjustment keeps them hanging straight.
Inspect the bottom guide. If a guide screw comes loose, the doors will wobble at the base. Check and retighten once a year.
Wipe mirror panels with glass cleaner. Use a microfiber cloth to avoid streaks. Avoid spraying directly on the panel; spray the cloth first to keep liquid away from the frame edges.
Final Thoughts
Installing sliding closet doors is a solid DIY project that most homeowners can complete in a single afternoon. The key is careful measuring, a level track, and taking the time to adjust the doors properly before calling it done. Rushing through any of those steps is where problems start.
If you want a truly custom result full-height mirrors, soft-close hardware, built-in organization systems, or a design that matches your room’s style a professional installation makes a big difference. Prestigious Custom Cabinets specializes in exactly that. Our Closet Installation Services in Long Island cover everything from standard sliding door installs to fully custom walk-in designs. If you want it done right the first time, we’re ready to help.
Whether you go DIY or bring in a pro, sliding doors are one of the best value upgrades you can make to any bedroom or hallway closet.

FAQs
How to install sliding closet doors on an existing opening?
Measure the opening, buy a kit sized to fit, install the top track into the header (hitting studs), attach rollers to the doors, hang the panels, add the bottom guide, and adjust until the doors glide smoothly. Most kits take 2 to 4 hours for a standard opening.
Can I install sliding closet doors by myself?
Yes, for most bypass door systems. Having a second person helps when hanging heavy mirror or glass panels, but one person can manage wood or MDF panels alone with some patience.
What size sliding closet doors do I need?
Measure the opening width and height. For bypass doors, each panel is usually half the opening width (plus a few inches of overlap). Standard heights are 80 or 96 inches. Always measure your specific opening, don’t assume it’s a standard size.
How much does sliding closet doors installation cost professionally?
Professional installation typically runs $150 to $400 for labor, depending on door type, weight, and region. Custom or heavy glass doors cost more. Materials are separate.
What is the best track system for heavy mirror doors?
A heavy-duty double-track surface-mounted system with ball-bearing rollers. Look for systems rated for at least the weight of your door panels. Most standard kits handle up to 50 lbs per panel; mirror doors often weigh 30 to 80 lbs depending on size.